Categories
Building Materials

Top-Quality Building Materials in Gansbaai: Where to Buy Locally

Whether you’re building from the ground up, renovating a coastal home, or tackling a DIY project, sourcing the right building materials in Gansbaai is essential. 

Not only do you need products that are durable and cost-effective, but it also helps to have a local supplier who knows the unique challenges of coastal construction.

At Build it Gansbaai, we stock a wide range of building materials that cater to both professional contractors and home builders. 

Here’s everything you need to know about sourcing quality materials locally—and why shopping at Build it makes all the difference.

Why Quality Matters in Coastal Builds

Gansbaai’s coastal environment presents specific construction challenges. Moisture, salt air, and strong winds can reduce the lifespan of inferior materials. 

That’s why quality should always come first when building in the Overberg region.

  • Moisture Resistance: Materials exposed to sea air need to resist corrosion, mould, and rot.
  • Structural Integrity: High winds require structurally sound roofing and bracing materials.
  • Longevity: Using high-grade materials means fewer repairs and long-term savings.

At Build it Gansbaai, we hand-pick our stock with these factors in mind—helping your build stand the test of time.

Top Building Material Options at Build it Gansbaai

We’re proud to stock a wide selection of trusted brands and essential supplies to meet your building needs.

Bricks & Cement

Whether you need clay face bricks, blocks, or paving bricks, we’ve got options suitable for both load-bearing and aesthetic use. 

Pair them with premium cement and mortar mixes for strength and stability.

Timber & Roofing

From structural timber to treated decking planks, our range is perfect for anything from framing to finishes

We also supply durable roofing materials including corrugated sheets, tiles, and waterproofing membranes—ideal for Gansbaai’s ever-changing weather.

Sand, Stone & Aggregates

We stock only SABS-approved aggregates for use in foundations, plastering, and concrete applications. 

Choose from building sand, crushed stone, and river sand—available for both pickup and local delivery.

Reinforcing Materials

We carry reinforcing mesh, Y-bars, and binding wire to ensure your structural components meet all safety and performance standards.

Benefits of Buying Building Materials Locally

Working with a local supplier like Build it Gansbaai has serious advantages:

  • Reliable stock availability to avoid long waits
  • Local delivery services for convenience
  • Expert advice from a team that understands Gansbaai’s climate
  • Support for the local economy and job creation

Whether you’re a contractor needing bulk orders or a homeowner starting a renovation, we’re here to make the process easier.

Visit Build it Gansbaai for All Your Building Needs

At Build it Gansbaai, we don’t just sell materials—we partner with you to make your build a success. 

Our knowledgeable team is here to guide you through product choices, offer accurate estimations, and assist with delivery planning.

Let’s Build Together—The Right Way, The Local Way.

Please follow us on social media to stay up to date with our latest sizzling specials and promotional offers! 

Build it Gansbaai offers added value services in respect of hardware retailing; embracing all activity within the building materials industry, focusing specifically on the building of; urban, township, rural housing as well as all home improvements and do it yourself.

(Build it is a division of the SPAR Group Limited South Africa. A voluntary trading group of individually owned retail stores with more than 10 000 employees across the group, we currently have stores in South Africa, Namibia, Swaziland, Lesotho and Mozambique with plans to expand into Botswana and Zambia in the near future. We view ourselves not only as a supplier of materials, but as a partner to our valued customers in accomplishing their building or renovating projects.)

Categories
Tips & Tricks

Keep the Rain Out: Waterproofing Tips for Winter in Gansbaai.

When winter rolls into Gansbaai, it doesn’t knock — it storms in. Between heavy rains and coastal moisture, your home can take a real beating if it’s not properly sealed. The good news? A little preparation now can save you a ton of trouble (and money) later.

At Build it Gansbaai, we know waterproofing — and we’re here to help you get your home winter-ready. Whether you’re tackling a leaky roof, damp walls, or a problem gutter, here are our top waterproofing tips to protect your home this season.

1. Inspect Your Roof for Cracks and Leaks

Start with your first line of defence — your roof. Look for cracked tiles, rusted screws, or loose sheeting. Even small leaks can lead to big water damage. If you’re unsure what to look for, our in-store team is happy to help you choose the right waterproofing membrane or roof paint.

2. Seal Windows and Doors

Cold drafts and rainwater can sneak in through poorly sealed frames. Use weatherstripping or sealants to fill any gaps around windows and doors. It’s a simple fix with big benefits — more comfort and lower heating bills!

3. Check and Clear Gutters

Clogged gutters cause water to overflow and damage walls and foundations. Clean them out before the storms arrive, and check that downpipes are firmly connected and angled away from the house.

4. Use Waterproofing Paints and Sealants

Coastal homes in Gansbaai benefit from paints designed to withstand moisture and salt air. Apply waterproofing coatings to exterior walls, roof ridges, and parapets. Products like liquid plastic or acrylic waterproofers are excellent for flat and pitched roofs alike.

5. Don’t Forget the Foundation

Rising damp can ruin interior walls. Make sure the ground around your home slopes away from the foundation. You can also treat interior walls with a damp-proofing solution — especially in older homes.

Ready to Waterproof? We’ve Got What You Need.
From tools and paints to expert advice, Build it Gansbaai has you covered. Pop in-store, give us a call, or send a WhatsApp — and let’s make sure your home stays dry this winter.

Visit our Official Facebook page for more tips & tricks, Build it Gansbaai Official Facebook Page.

Categories
How To

How to Revive Your Outdoor Space with Deck Paint

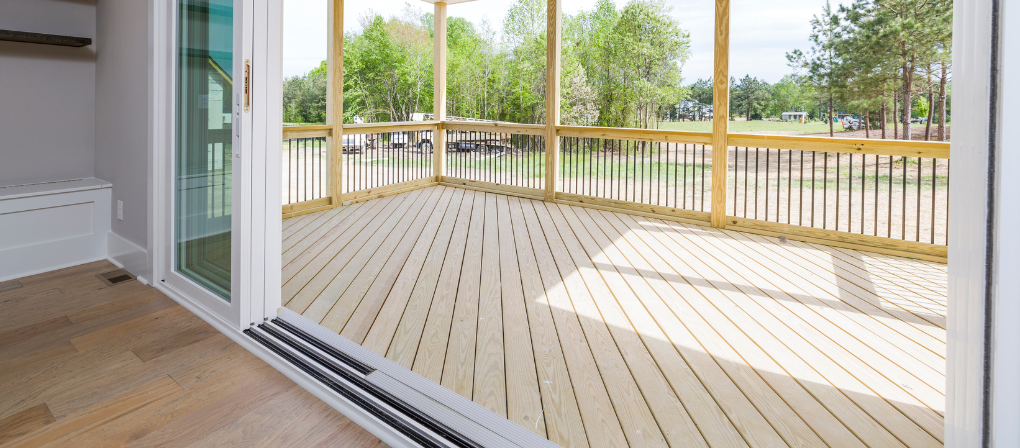
A well-maintained deck is the perfect outdoor retreat, but over time, weather exposure and heavy use can cause it to fade, splinter, and crack. If your deck has seen better days, applying deck paint is an affordable and effective way to restore it to its former glory. 

With the right tools, materials, and guidance from Build it Gansbaai, you can complete this project over a weekend, leaving your deck looking fresh, durable, and ready for years of enjoyment.

In this guide, we’ll walk you through everything you need to know about choosing and applying deck paint, from preparation to the final coat. 

Whether you’re a DIY enthusiast or tackling your first project, this article will provide step-by-step instructions and answer common queries about restoring your deck.

What Is Deck Paint?

Deck paint is a specially formulated coating designed to protect and revitalize wooden decks. 

Unlike regular paint, deck paint is thicker and contains added materials such as acrylic, sand, or aluminium solids that create a durable, textured surface. 

This coating fills in cracks, covers splinters, and forms a water-resistant barrier to shield your deck from moisture and UV damage.

Benefits of Deck Paint:

  • Enhanced Durability: Protects wood from wear, cracking, and fading caused by weather exposure.
  • Safety: Provides a slip-resistant surface, making it safer to walk on, even when wet.
  • Aesthetic Appeal: Revitalizes your deck with a fresh, clean appearance in your chosen colour.
  • Long-Lasting Results: With proper application, high-quality deck paint can last up to 12 years without needing reapplication.

Tools and Materials You’ll Need

To achieve a professional finish with deck paint, you’ll need the following tools and materials:

Tools:
  • Paint tray
  • Paint rollers (one for every 15 litres of paint)
  • Paintbrushes
  • Safety glasses
  • Firm scrubbing brush
  • Roller extension pole
  • High-pressure hose (available for rent if you don’t own one)
Materials:
  • Masking tape
  • Plastic sheeting
  • Acrylic caulk (for filling cracks)
  • Deck cleaner (manufacturer-recommended for compatibility)
  • Deck paint (restoration coating)
  • Paint stirring sticks

Step 1: Choosing the Right Deck Paint

Selecting the best deck paint for your project is the foundation of success. At Build it Gansbaai, we highly recommend Woodoc Water-Borne Deck for its superior performance and durability.

Why Woodoc Water-Borne Deck Paint?

  • Developed in South Africa with advanced international technology.
  • High UV protection to withstand the harsh African sun.
  • Designed specifically for wooden decks and staircases, offering long-lasting beauty and protection.

If Woodoc isn’t your preferred choice, our knowledgeable staff at Build it Gansbaai can help you find alternative options that suit your needs and budget. 

Be sure to select a colour that complements your home while considering practical factors. 

For example, darker colours may absorb more heat, making the deck uncomfortably warm on sunny days.

Step 2: Preparing the Surface

Proper preparation is key to ensuring that your deck paint adheres effectively and lasts for years. Follow these steps:

1. Protect the Surrounding Area

  • Cover nearby posts, rails, and walls with plastic sheeting and secure it with masking tape.
  • Spread plastic sheeting or drop cloths under the deck to catch drips and minimize cleanup.

2. Inspect and Repair the Deck

  • Reset protruding nails and secure any loose boards with deck screws.
  • Use 80-grit sandpaper to sand the entire deck, removing old paint or finishes and roughing up the surface for better adhesion.

3. Clean the Deck Thoroughly

  • Dilute the deck cleaning product according to the manufacturer’s instructions.
  • Apply the cleaner and let it soak in for the recommended time.
  • Use a firm scrubbing brush to remove grease, dirt, and grime.
  • Finish by using a high-pressure hose to rinse away debris, paying special attention to gaps between boards.

4. Allow the Deck to Dry

After cleaning, let the deck dry completely for about a week to ensure the wood is moisture-free before applying deck paint.

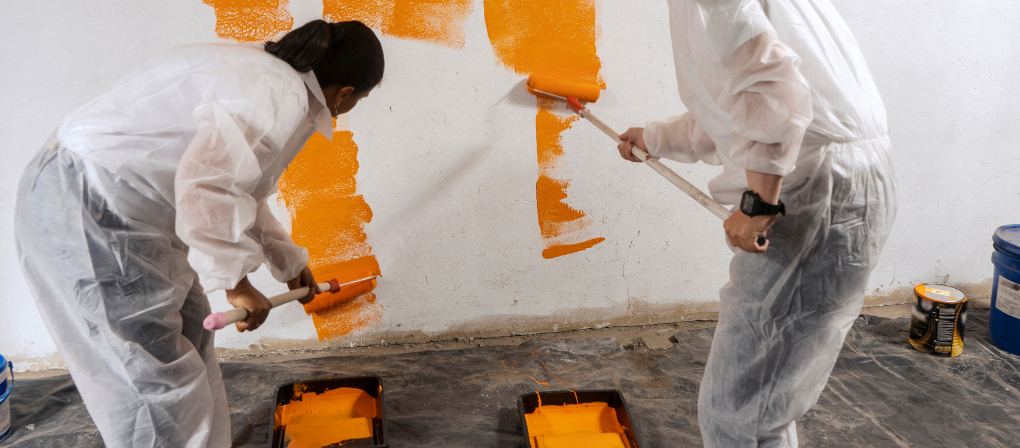
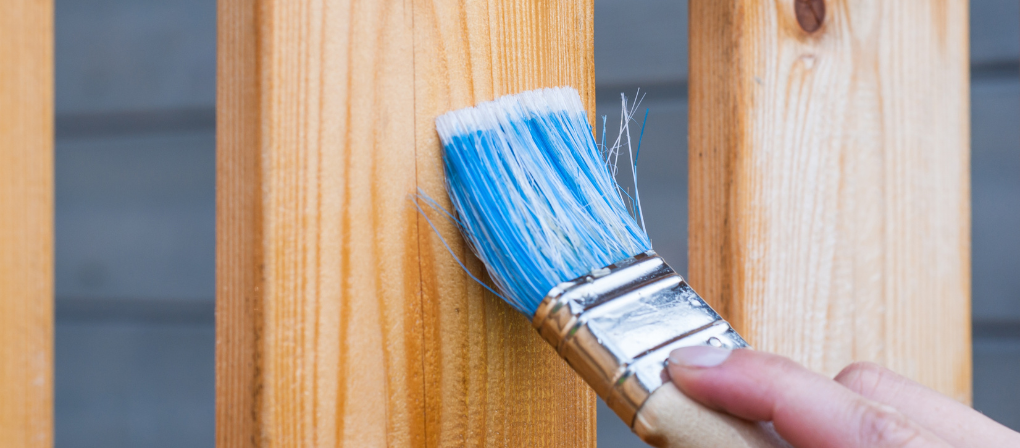
Step 3: Applying Deck Paint

With the preparation complete, it’s time to transform your deck with deck paint. This process can be completed over a weekend.

Day 1: Apply the First Coat
  1. Fill Cracks and Holes: Use acrylic caulk to fill any visible gaps or imperfections. Allow it to set before painting.
  2. Roll on the First Coat: Dip the roller in the paint tray and press it down firmly onto the boards. Apply a thick, even coat, covering several boards at a time.
  3. Drying Time: Allow the first coat to dry for at least six hours or until it’s dry to the touch.

Note: The first coat acts as a primer, ensuring that all restored areas are sealed and ready for the final finish.

Day 2: Apply the Second Coat
  1. Apply the Final Coat: Repeat the same method used for the first coat. Take your time to ensure an even and thorough application.
  2. Drying Time: Let the second coat cure for at least two days before using the deck. This extended drying time ensures that the coating fully bonds to the wood.

Tips for a Successful Deck Restoration

  • Weather Considerations: Choose a dry, warm weekend for your project. Avoid painting when rain is imminent or during extremely hot hours when the deck’s surface may exceed 50°C.
  • Manufacturer’s Instructions: Always read and follow the manufacturer’s guidelines for both cleaning and painting products.
  • Maintenance: To keep your deck looking its best, clean it regularly with the manufacturer’s recommended deck cleaner and reapply a maintenance coat as needed.

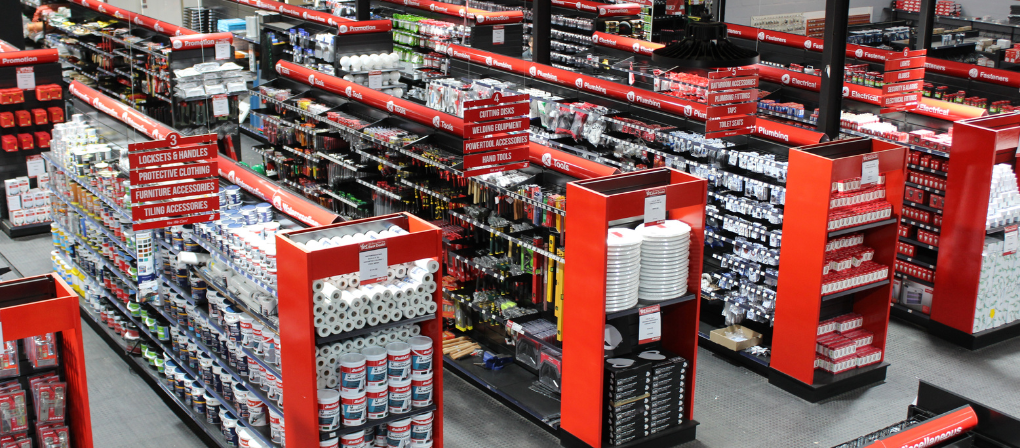
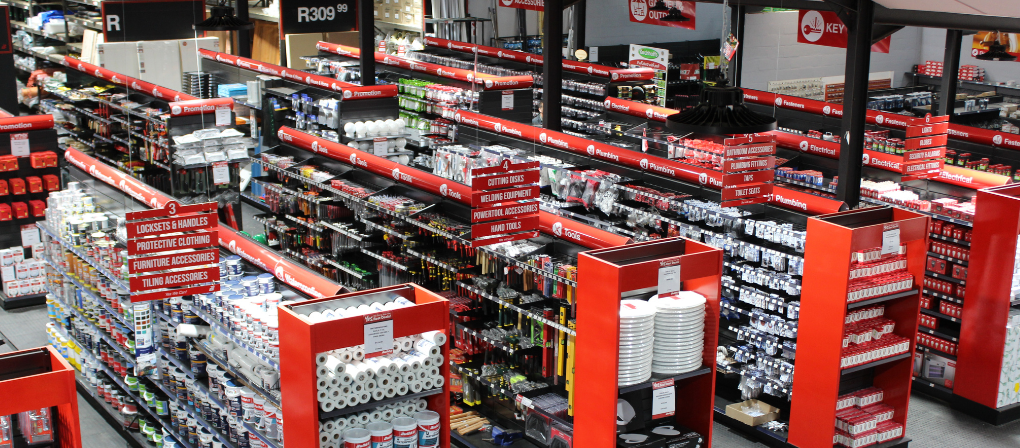
Why Choose Build it Gansbaai for Your Deck Paint Needs?

At Build it Gansbaai, we’re committed to providing the highest quality deck paint and restoration products. 

Our friendly team is always on hand to offer expert advice, ensuring you choose the perfect solution for your deck. 

Whether it’s finding the right colour or selecting tools and materials, we have everything you need under one roof.

Revive Your Deck with Deck Paint

Using high-quality deck paint is the most cost-effective way to rejuvenate your outdoor space, providing a durable and visually appealing finish. 

By carefully preparing your deck and following proper application techniques, you can extend its lifespan and protect it from the elements for years to come. 

Build it Gansbaai offers top-notch deck paint, tools, and guidance to make your project a success.

Visit Build it Gansbaai today to explore our range of deck paint options and start your journey toward a beautifully restored deck. 

Our knowledgeable team is here to help every step of the way.

Please follow us on social media to stay up to date with our latest sizzling specials and promotional offers! 

Build it Gansbaai offers added value services in respect of hardware retailing; embracing all activity within the building materials industry, focusing specifically on the building of; urban, township, rural housing as well as all home improvements and do it yourself.

Build it is a division of the SPAR Group Limited South Africa. A voluntary trading group of individually owned retail stores with more than 10 000 employees across the group, we currently have stores in South Africa, Namibia, Swaziland, Lesotho and Mozambique with plans to expand into Botswana and Zambia in the near future. We view ourselves not only as a supplier of materials, but as a partner to our valued customers in accomplishing their building or renovating projects.

Categories
Guide

Best Indoor Paints from Build it Gansbaai for Various Rooms in Your Home.

Choosing the right indoor paints for your home is essential for creating the perfect atmosphere, enhancing durability, and ensuring easy maintenance. 

Each room in your house has unique requirements based on factors like moisture, lighting, and usage. 

At Build it Gansbaai, we understand the importance of selecting the best indoor paints to suit every space. 

In this guide, we’ll explore the ideal paint types, finishes, and colours for different rooms in your home, helping you make an informed decision.

Understanding Indoor Paint Finishes

Before choosing the best indoor paints, it’s important to understand the different paint finishes available and their best applications.

1. Matte (Flat) Finish

  • Best for: Bedrooms, ceilings, and low-traffic areas
  • Pros: Hides imperfections, absorbs light, and creates a smooth, elegant look
  • Cons: Not as durable or easy to clean as other finishes

2. Eggshell Finish

  • Best for: Living rooms and dining rooms
  • Pros: Slightly glossy, easy to clean, and hides minor wall flaws
  • Cons: Not as durable as satin or semi-gloss finishes

3. Satin Finish

  • Best for: Kitchens, bathrooms, and high-traffic areas
  • Pros: Offers a soft sheen, is highly durable, and is easy to clean
  • Cons: Slightly highlights wall imperfections

4. Semi-Gloss Finish

  • Best for: Trim, doors, kitchens, and bathrooms
  • Pros: Reflects light, resists moisture, and withstands frequent cleaning
  • Cons: Can show surface flaws more than lower-sheen finishes

5. Glossy Finish

  • Best for: Furniture, cabinets, and decorative elements
  • Pros: Provides a polished, high shine look and is very durable
  • Cons: Highlights every flaw, requiring a well-prepared surface

Best Indoor Paints for Different Rooms

Each room in your home has specific conditions that influence the type of indoor paints you should use. Below, we break down the best options for each space.

1. Living Room: Warm and Inviting Colours

Your living room is the heart of your home, where family and guests gather to relax and socialize. 

The best indoor paints for this space should create a warm and welcoming atmosphere.

  • Recommended Finishes: Eggshell or satin for easy maintenance and a slight sheen
  • Best Colours:
    • Neutral Tones: Beige, grey, or warm white for a classic look
    • Soft Blues & Greens: Calming and sophisticated
    • Earthy Hues: Warm browns, taupes, or terracotta for a cozy feel

Pro Tip: A feature wall in a deeper shade can add character without overwhelming the room.

2. Kitchen: Durable and Easy to Clean

The kitchen is a high-traffic area prone to grease, stains, and moisture. The right indoor paints must be durable, easy to clean, and resistant to humidity.

  • Recommended Finishes: Satin or semi-gloss for easy cleaning and moisture resistance
  • Best Colours:
    • White & Light Greys: Brightens up the space and complements modern kitchens
    • Soft Greens & Blues: Refreshing and inviting
    • Warm Yellows: Adds energy and warmth

Pro Tip: Semi-gloss finishes work well for cabinets and trim, making them easy to wipe clean.

3. Bedroom: Relaxing and Cozy Ambiance

A bedroom should be a restful retreat, so the best indoor paints should promote relaxation and comfort.

  • Recommended Finishes: Matte or eggshell for a soft, calming look
  • Best Colours:
    • Cool Blues & Greens: Promote relaxation and sleep
    • Muted Neutrals: Warm greys, taupe, or beige for a sophisticated touch
    • Soft Pinks & Lavenders: Ideal for a cozy, romantic feel

Pro Tip: Avoid overly bright colours, as they can be too stimulating for a restful environment.

4. Bathroom: Moisture-Resistant and Mold-Preventing Paints

Bathrooms experience high levels of humidity, making moisture-resistant indoor paints a must.

  • Recommended Finishes: Satin or semi-gloss for water resistance and easy cleaning
  • Best Colours:
    • Soft Whites & Creams: Create a clean, fresh look
    • Cool Blues & Greens: Enhance a spa-like atmosphere
    • Light Greys: Add modern elegance

Pro Tip: Choose mould-resistant paint formulas to prevent mildew growth.

5. Dining Room: Elegant and Sophisticated

The dining room is a space for entertaining, so the right indoor paints should enhance the mood while being durable.

  • Recommended Finishes: Eggshell or satin for a refined look
  • Best Colours:
    • Deep Reds & Burgundy: Create a luxurious, formal feel
    • Rich Greens & Blues: Provide sophistication and warmth
    • Classic Neutrals: Keep the space timeless

Pro Tip: A bold accent wall in a darker shade can add drama and depth.

6. Home Office: Productivity-Boosting Hues

With more people working from home, choosing the right indoor paints for a home office can boost productivity and focus.

  • Recommended Finishes: Eggshell or satin for durability without excess shine
  • Best Colours:
    • Soft Blues & Greens: Enhance concentration and calmness
    • Neutral Greys: Professional and modern
    • Energizing Yellows: Encourage creativity and positivity

Pro Tip: Avoid overly dark colours that can make the space feel cramped and uninspiring.

7. Kids’ Room: Fun and Functional

A child’s room should be playful yet practical, making washable and durable indoor paints the best option.

  • Recommended Finishes: Satin or semi-gloss for easy cleaning
  • Best Colours:
    • Bright Blues & Yellows: Fun and energetic
    • Soft Pinks & Purples: Create a dreamy, soothing space
    • Chalkboard Paint: A fun way to add an interactive element

Pro Tip: Consider using low-VOC paints for better air quality, especially for children.

Choosing the Right Indoor Paint at Build it Gansbaai

At Build it Gansbaai, we offer a wide selection of indoor paints suitable for every room in your home. 

Whether you need durable, moisture-resistant paint for your kitchen and bathroom or soft, relaxing hues for your bedroom, we have the perfect product for your needs.

Why Shop with Us?

  • Expert Advice: Our knowledgeable team can help you choose the best indoor paints for your project.
  • High-Quality Brands: We stock top-rated paints designed for durability and beauty.
  • Affordable Prices: Get premium quality paints at competitive prices.

Visit Build it Gansbaai today and explore our extensive range of indoor paints. Our team is ready to help you transform your home with the perfect colours and finishes!

Please follow us on social media to stay up to date with our latest sizzling specials and promotional offers! 

Build it Gansbaai offers added value services in respect of hardware retailing; embracing all activity within the building materials industry, focusing specifically on the building of; urban, township, rural housing as well as all home improvements and do it yourself.

Build it is a division of the SPAR Group Limited South Africa. A voluntary trading group of individually owned retail stores with more than 10 000 employees across the group, we currently have stores in South Africa, Namibia, Swaziland, Lesotho and Mozambique with plans to expand into Botswana and Zambia in the near future. We view ourselves not only as a supplier of materials, but as a partner to our valued customers in accomplishing their building or renovating projects.

Categories
Hardware Store

Discover the Best Tools and Materials at Your Local Gansbaai Hardware Store.

Welcome to your go-to Gansbaai hardware store! Whether you’re a professional contractor or a DIY enthusiast, finding the right tools and materials is crucial for any project. In this blog, we’ll explore why Build it Gansbaai is your top choice for hardware, building supplies, and expert advice right in your community.

Wide Range of Products

At Build it Gansbaai, we pride ourselves on offering a vast selection of high-quality products. From basic hand tools to advanced power tools, plumbing supplies to electrical fittings, we have everything you need to tackle any job — big or small. Explore our aisles to find exactly what you need at competitive prices.

Expert Advice and Customer Service

What sets us apart from other Gansbaai hardware stores is our commitment to customer service. Our knowledgeable staff are always on hand to answer your questions, offer practical advice, and guide you to the best products for your projects. Whether you’re renovating your home or fixing a leak, we’re here to help every step of the way.

Community and Sustainability

As a part of the Gansbaai community, we believe in supporting local initiatives and promoting sustainable practices. We source eco-friendly products and offer solutions that help reduce environmental impact. Supporting your local Gansbaai hardware store means investing in the community and contributing to a sustainable future.

Special Offers and Promotions

Keep an eye on our latest promotions and special offers designed to give you the best value for your money. At Build it Gansbaai, we understand the importance of budget-friendly solutions, and we strive to bring you the best deals in town. Visit us in-store or check our website regularly to not miss out on any offers.

Build it Gansbaai is more than just a hardware store; we are a part of your community. With a wide range of products, expert advice, and a commitment to service and sustainability, we are here to help you succeed in all your building and DIY projects. Stop by today and experience the difference at your local Gansbaai hardware store!

Visit Build it Gansbaai today or contact us to learn more about our products and how we can assist you with your next project. Let us help you build your dreams! For the latest promotions, information and promotions visit our Build it Gansbaai Facebook Page.

Categories
How To

How to Achieve a Flawless Finish with Wood Paint.

Painting wood is a rewarding DIY project that can transform furniture, cabinets, or trim into beautiful and durable features. However, achieving smooth, professional results requires the right preparation, tools, and techniques. 

At Build it Gansbaai, we know how important it is to get the job done right, which is why we’ve put together this detailed guide to help you master the art of using wood paint.

Whether you’re tackling a home improvement project or refreshing old furniture, this guide covers everything you need to know to achieve a flawless finish.

What is Wood Paint and Why Does It Matter?

Wood paint is specifically designed to adhere to wooden surfaces while providing a smooth and long-lasting finish smooth and long-lasting finish

Unlike general-purpose paints, wood paint contains properties that allow it to withstand wear and tear, resist moisture, and enhance the natural beauty of wood.

Why Use Wood Paint?

  • Durability: Protects wood from scratches, stains, and damage.
  • Aesthetic Appeal: Adds colour, shine, or a textured finish for a refined look.
  • Versatility: Suitable for furniture, trim, cabinets, and more.
  • Protection: Prevents moisture penetration, which can lead to warping or decay.

Tools and Materials You’ll Need for Painting Wood

To achieve a smooth and even finish with wood paint, it’s essential to have the right tools and materials on hand. Here’s a checklist to help you get started:

Equipment/Tools:

  • Plastic drop sheeting
  • Rubber gloves
  • Bucket
  • Clean cloths
  • Random orbital sander or sandpaper
  • Vacuum
  • 70mm paintbrush
  • High-density foam roller
  • Paint tray

Materials:

  • TSP (tri-sodium phosphate) or a similar cleaner
  • 180-grit and 220-grit sandpaper
  • Tack cloth
  • Primer
  • Enamel or interior acrylic-latex wood paint
  • Paint additives like Penetrol or Floetrol (optional)

Step-by-Step Guide to Painting Wood

To achieve the best results with wood paint, follow these simple steps. Proper preparation and patience are key to creating a professional-quality finish.

Step 1: Prepare the Workspace and Clean the Wood

Protect Your Work Area
  • Cover your floors, workbench, or other surfaces with plastic drop sheeting to catch spills and drips.
  • Ensure proper ventilation, especially if you’re using oil-based paints or strong cleaners.
Clean the Wood
  • Mix a solution of TSP with warm water according to the product instructions.
  • Dampen a clean cloth with the solution, wring it out, and wipe down the wood to remove dirt, grease, and oils.
  • Let the wood dry completely.

Pro Tip: TSP is an excellent degreaser, but if it’s unavailable, you can use a similar surface cleaner.

Step 2: Sand and Prime the Wood

Sand the Wood
  • Start with 120-grit sandpaper to smooth the bare wood surface. This step creates a slightly rough texture that helps the primer adhere better.
  • After priming, use 220-grit sandpaper for a finer, smoother finish.
Apply Primer
  • Use a primer specifically formulated for wood surfaces. Apply a thin, even coat using a brush or roller.
  • If the primer appears streaky or uneven, apply a second coat once the first layer is dry.
Smooth the Primer
  • Once the primer is dry, sand it lightly with 220-grit sandpaper for a super-smooth base.
  • Vacuum the surface to remove dust, then use a tack cloth to pick up any remaining particles.

Step 3: Choose the Right Wood Paint

Selecting the right wood paint is essential for a successful project. At Build it Gansbaai, we recommend high-quality enamel paint for its durability and smooth finish

Enamel paint dries harder than regular paint, making it ideal for cabinets, furniture, and trim.

Additives to Consider:
  • Penetrol: Improves the flow of oil-based paints, reducing brush marks and increasing adhesion.
  • Floetrol: Enhances the levelling and flow of water-based paints, giving you a smoother finish.

These additives slow down the drying process, making it easier to achieve a flawless coat.

Step 4: Apply the Wood Paint

Roll the Paint On
  • Use a high-density foam roller to apply the first coat of wood paint. Foam rollers are excellent for creating a smooth, streak-free finish, especially on flat surfaces.
  • Work in small sections, keeping a wet edge to avoid lap marks.
Use a Paintbrush for Details
  • For crevices, edges, and corners, use a quality paintbrush to fill in areas the roller can’t reach.
Let It Dry
  • Allow the first coat to dry completely (refer to the paint manufacturer’s instructions). This step is critical to achieving durability and a smooth finish.

Step 5: Apply Additional Coats

Inspect the First Coat
  • Check for imperfections, such as streaks or thin areas. Sand lightly if necessary.
  • Remove dust with a tack cloth before applying the next coat.
Apply the Second Coat
  • Repeat the process with the foam roller and brush, ensuring even coverage.
  • Allow the final coat to dry overnight for the best results.

Pro Tip: Avoid applying a second coat while the first is still tacky, as this can cause tearing or unevenness.

Tips for Perfect Results

Here are some extra tips to ensure success with wood paint:

  • Work in Optimal Conditions: Avoid painting in humid or very cold conditions, as this can affect drying time and finish quality.
  • Don’t Rush: Take your time to prep, paint, and dry each layer for a professional-looking result.
  • Practice Makes Perfect: If you’re new to painting, practice on a scrap piece of wood before starting your main project.

Why Choose Build it Gansbaai for Your Wood Paint Needs?

At Build it Gansbaai, we offer a wide range of high-quality wood paint, primers, and painting tools to help you achieve the best results. 

Our knowledgeable staff is here to answer your questions and recommend the right products for your project.

What We Offer:

  • Top Brands: Choose from trusted manufacturers for long-lasting results.
  • Expert Advice: Our experienced team can guide you through every step of your project.
  • Local Delivery: We supply the greater Overberg area with everything you need for home improvement.

Transform Your Wooden Surfaces with the Right Paint

Using wood paint is an affordable and effective way to refresh your furniture, cabinets, or trim. 

By following these steps and choosing the best products, you can achieve a smooth, durable finish that enhances the beauty of your home. 

Whether you’re a seasoned DIYer or a first-time painter, Build it Gansbaai is your trusted partner for quality supplies and expert advice.

Visit Build it Gansbaai today to explore our range of wood paint, tools, and materials. Our friendly team is ready to help you bring your vision to life!

Please follow us on social media to stay up to date with our latest sizzling specials and promotional offers! 

Build it Gansbaai offers added value services in respect of hardware retailing; embracing all activity within the building materials industry, focusing specifically on the building of; urban, township, rural housing as well as all home improvements and do it yourself.

Build it is a division of the SPAR Group Limited South Africa. A voluntary trading group of individually owned retail stores with more than 10 000 employees across the group, we currently have stores in South Africa, Namibia, Swaziland, Lesotho and Mozambique with plans to expand into Botswana and Zambia in the near future. We view ourselves not only as a supplier of materials, but as a partner to our valued customers in accomplishing their building or renovating projects.

Categories
Hardware Store

Discover the Go-To Hardware Store in Gansbaai, Build it Gansbaai!

Nestled in the charming coastal town of Gansbaai, Build it Gansbaai has become the trusted name for quality building materials and DIY supplies. If you’re searching for the best hardware store in Gansbaai, look no further. Build it Gansbaai offers an unmatched selection of products, expert advice, and community-focused service.

A Wide Range of Building Supplies

At Build it Gansbaai, you’ll find everything you need for your next project. From large-scale construction jobs to simple home improvements, our hardware store stocks a wide variety of:

  • Cement and Concrete Products: Choose from leading brands for durable, long-lasting structures.
  • Timber and Roofing Materials: Get quality wood and roof trusses tailored to your project’s needs.
  • Plumbing and Electrical Supplies: Find fittings, pipes, and wiring for safe, efficient installations.
  • Paint and Decor: Refresh your space with vibrant colors and tools for flawless finishes.

Every product is carefully chosen to meet the high standards expected by both professionals and DIY enthusiasts in Gansbaai and the surrounding Western Cape area.

Expert Advice and Exceptional Service

What sets Build it Gansbaai apart from other hardware stores in Gansbaai is the personalized service. Our knowledgeable staff is here to guide you through every step of your project. Whether you’re tackling a major renovation or need help choosing the right tools, we’ll ensure you have the support you need to succeed.

We also offer specialized services, including:

  • Key Cutting: Quickly replace lost keys or get duplicates made.
  • Glass and Board Cutting: Save time with precision cuts tailored to your specifications.
  • Delivery Services: Enjoy the convenience of having heavy materials delivered right to your doorstep.

Affordable Prices and Regular Promotions

At Build it Gansbaai, affordability is just as important as quality. Our regular promotions make it easy to save on essential hardware and building materials. Keep an eye out for seasonal sales and special deals that help you stretch your budget further.

Looking for unbeatable prices on paint, tools, or building supplies? Visit Build it Gansbaai to explore the latest offers and take advantage of value-packed discounts.

Why Choose Build it Gansbaai?

As the leading hardware store in Gansbaai, we’re committed to supporting our local community. By partnering with local contractors, builders, and DIY enthusiasts, we help bring projects to life and strengthen the fabric of Gansbaai.

Here’s why we’re the preferred choice:

  1. Comprehensive Product Range: Everything you need under one roof.
  2. Trusted Brands: We stock only reputable brands known for quality and reliability.
  3. Friendly Service: Our team is dedicated to providing a seamless shopping experience.
  4. Convenient Location: Easily accessible, with ample parking available.

Supporting Gansbaai’s Growth

Build it Gansbaai is more than just a hardware store in Gansbaai—it’s a vital part of the community. From supporting local initiatives to helping families build their dream homes, we take pride in contributing to Gansbaai’s development.

Whether you’re a contractor seeking bulk materials or a homeowner embarking on a weekend DIY project, Build it Gansbaai is your reliable partner. With years of experience and a commitment to excellence, we’re here to make every project a success.

Visit Build it Gansbaai Today

Ready to transform your ideas into reality? Visit Build it Gansbaai, the premier hardware store in Gansbaai, for all your building and DIY needs. Our team is eager to help you find the perfect solutions for your project, big or small.

Address: 34 Industry Cir, Gansbaai, 7220
Contact: 028 384 1543

Visit our Build it Gansbaai Facebook Page today for more information and the latest promotions.

Make your next visit to Build it Gansbaai and experience the difference of working with a team that truly cares about your success. Your trusted hardware store in Gansbaai is just a visit away!

Categories
Guide

A Guide to 5 Fun DIY Projects a Family Can Do Together This Winter.

Winter is the perfect time to gather the family and embark on some exciting DIY projects. Not only do these projects bring the family closer, but they also allow everyone to unleash their creativity and develop useful skills. 

At Build it Gansbaai, we are passionate about providing the highest quality building materials and tools to help you create wonderful memories with your loved ones. 

Here are five fun DIY projects that your family can enjoy together this winter.

1. Build a Birdhouse

Materials and Tools Needed:

  • Wooden planks
  • Nails and screws
  • Wood glue
  • Sandpaper
  • Paint and brushes
  • Hammer
  • Screwdriver
  • Measuring tape
  • Saw

Instructions:

Building a birdhouse is a fantastic project that brings a touch of nature to your home and helps teach children about wildlife. Start by deciding on the design of your birdhouse. A simple rectangular birdhouse with a slanted roof is ideal for beginners.

  1. Measure and Cut: Measure and cut the wooden planks to create the front, back, sides, roof, and base of the birdhouse. Ensure all pieces fit together perfectly.
  2. Assemble the Base and Sides: Use wood glue and nails to attach the sides to the base. Make sure the structure is stable.
  3. Attach the Front and Back: Secure the front and back pieces to the sides and base using screws.
  4. Create the Roof: Attach the roof pieces, ensuring they meet at a slant to allow rainwater to run off.
  5. Sand and Paint: Sand down any rough edges and paint the birdhouse in vibrant colours to attract birds.
  6. Install: Once dry, hang the birdhouse in your garden or backyard.

2. Create a Family Photo Wall

Materials and Tools Needed:

  • Photo frames
  • Printed family photos
  • Nails and screws
  • Hammer
  • Measuring tape
  • Level
  • Pencil

Instructions:

A family photo wall is a heartwarming project that showcases your cherished memories. It’s a wonderful way to personalize your home and can be easily updated with new photos.

  1. Select Photos: Choose a variety of family photos, including portraits, candid shots, and vacation memories.
  2. Frame the Photos: Place each photo in a frame. Mix and match different frame styles for a unique look.
  3. Plan the Layout: Arrange the frames on the floor to determine the best layout. Take measurements and use a pencil to mark where each frame will go on the wall.
  4. Hang the Frames: Starting from the centre, use a level to ensure each frame is straight. Secure the frames to the wall with nails or screws.
  5. Final Touches: Adjust the frames as needed and step back to admire your family’s collective work of art.

3. DIY Pallet Furniture

Materials and Tools Needed:

  • Wooden pallets
  • Sandpaper
  • Paint or wood stain
  • Nails and screws
  • Wood glue
  • Hammer
  • Screwdriver
  • Saw
  • Measuring tape
  • Cushions (optional)

Instructions:

Pallet furniture is an eco-friendly project that adds a rustic charm to your home. This project is versatile and can be customized to create anything from a coffee table to an outdoor sofa.

  1. Choose Your Design: Decide on the type of furniture you want to create. A simple pallet coffee table or bench is a good starting point.
  2. Prepare the Pallets: Sand down the pallets to remove any rough edges and splinters.
  3. Assemble the Furniture: Stack the pallets to your desired height and secure them together with nails and wood glue. If making a bench, add extra support by attaching additional planks.
  4. Finish: Paint or stain the furniture to match your home’s decor.
  5. Add Comfort: For seating furniture, add cushions for extra comfort.

4. Craft a Customized Chalkboard

Materials and Tools Needed:

  • Wooden frame or large piece of wood
  • Chalkboard paint
  • Paintbrushes
  • Sandpaper
  • Tape measure
  • Painter’s tape
  • Screws and screwdriver

Instructions:

A customized chalkboard is a fun and functional addition to any home. It’s perfect for jotting down notes, making to-do lists, or letting the kids express their creativity.

  1. Select a Surface: Choose a wooden frame or a large piece of wood to serve as your chalkboard base.
  2. Prepare the Surface: Sand down the wood to ensure it’s smooth and free of splinters.
  3. Apply Chalkboard Paint: Use painter’s tape to create clean edges. Apply the chalkboard paint in even strokes, following the manufacturer’s instructions. Multiple coats may be necessary for a smooth finish.
  4. Dry and Cure: Allow the paint to dry completely and cure as recommended.
  5. Mount the Chalkboard: Use screws to mount the chalkboard to the wall at a height that’s easily accessible for all family members.

5. Build a Window Herb Garden

Materials and Tools Needed:

  • Wooden planks or pallets
  • Small pots or containers
  • Soil and herb seeds
  • Nails and screws
  • Hammer
  • Saw
  • Sandpaper
  • Paint or wood stain
  • Paintbrushes
  • Measuring tape

Instructions:

A window herb garden is a delightful project that brings the joy of gardening indoors. It’s an excellent way to teach children about plants and the importance of fresh ingredients.

  1. Choose a Location: Select a sunny window where your herbs will receive plenty of light.
  2. Build the Frame: Measure and cut the wooden planks or pallets to create a frame that fits your chosen window. Sand down any rough edges.
  3. Attach Containers: Secure small pots or containers to the frame with screws. Ensure they are spaced evenly.
  4. Paint or Stain: Finish the frame with paint or wood stain to match your decor.
  5. Plant the Herbs: Fill the containers with soil and plant your chosen herb seeds. Label each container for easy identification.
  6. Install the Frame: Secure the frame to the window frame or wall, ensuring it’s stable and safe.

These DIY projects are not only fun and engaging but also provide valuable opportunities for families to bond and learn new skills together. 

At Build it Gansbaai, we offer a wide range of building materials and tools to help you complete these projects with ease and success. 

Whether you’re a seasoned DIY enthusiast or just starting, our expert team is here to provide guidance and support every step of the way.

Visit Build it Gansbaai to explore our extensive selection of high-quality building materials and tools. 

Let’s make this winter a season of creativity, learning, and family fun. Happy DIYing! Don’t forget to follow us on social media to stay updated on our latest specials and offers! 

Build it Gansbaai offers added value services in respect of hardware retailing; embracing all activity within the building materials industry, focusing specifically on the building of; urban, township, rural housing as well as all home improvements and do it yourself. Visiting Hermanus area? Stop by our Build it Hermanus store.

Build it is a division of the SPAR Group Limited South Africa. A voluntary trading group of individually owned retail stores with more than 10 000 employees across the group, we currently have stores in South Africa, Namibia, Swaziland, Lesotho and Mozambique with plans to expand into Botswana and Zambia in the near future. We view ourselves not only as a supplier of materials, but as a partner to our valued customers in accomplishing their building or renovating projects.

Categories
Guide

How to Winter Proof Your House on a Tight Budget.

At Build it Gansbaai, we understand the need for cost-effective methods to winter proof your house. As winter approaches in Gansbaai, keeping your home warm and cozy can become a top priority. Given the rising costs of heating and the economic challenges many face, it’s essential to find budget-friendly solutions.

In this guide, we will explore practical DIY solutions to keep your house warm this winter, using readily available building materials and tools.

Understanding the Basics, and Winter Proof Your House now.

Winter proofing involves a combination of insulation, draught-proofing, and efficient heating. 

1. Insulation: Keeping the Heat In

Proper insulation is the cornerstone of a warm home. Here are some budget-friendly ways to improve insulation:

Roof and Attic Insulation

Heat rises, and a significant amount of warmth can be lost through an uninsulated roof. Adding insulation to your attic or roof space is a highly effective way to retain heat.

  • Materials Needed: Fibreglass insulation rolls or batts, reflective foil insulation, or cellulose insulation.
  • Tools Required: Utility knife, stapler, tape measure, protective gloves, and goggles.

Steps:

  1. Measure the Area: Calculate the total area of your attic or roof space to determine the amount of insulation material needed.
  2. Prepare the Space: Clear the attic of any clutter and ensure it is clean and dry.
  3. Install the Insulation: Lay the insulation material between the joists, ensuring it fits snugly without gaps. Use reflective foil insulation on the underside of the roof for added efficiency.
Wall Insulation

While insulating walls can be more complex, there are simpler methods for those on a tight budget.

  • Materials Needed: Bubble wrap, thermal curtains, and wall hangings.
  • Tools Required: Scissors, tape measure, and a stapler.

Steps:

  1. Bubble Wrap: Apply bubble wrap to the inside of windows to create a barrier that reduces heat loss. Simply cut the wrap to size and attach it to the window using a spray bottle filled with water.
  2. Thermal Curtains: Invest in thermal curtains, which are designed to reduce heat loss through windows. These curtains have a special lining that helps retain heat.
  3. Wall Hangings: Use thick tapestries or blankets as decorative wall hangings to add an extra layer of insulation.

2. Draught-Proofing: Sealing the Gaps

However, draughts can significantly reduce the warmth of your home by allowing cold air to seep in. Sealing these gaps is an easy and cost-effective way to improve comfort.

Doors and Windows
  • Materials Needed: Draught excluders, weatherstripping tape, and door sweeps.
  • Tools Required: Scissors, tape measure, and adhesive.

Steps:

  1. Weatherstripping: Apply self-adhesive weatherstripping tape around the edges of doors and windows to seal any gaps.
  2. Draught Excluders: Use draught excluders at the bottom of doors to prevent cold air from entering. These can be purchased or made at home using fabric and stuffing.
  3. Door Sweeps: Install door sweeps at the bottom of external doors to create a seal when the door is closed.
Chimneys and Vents

Unused chimneys and vents can be sources of draughts.

  • Materials Needed: Chimney balloon or a chimney draught excluder.
  • Tools Required: None required for chimney balloons, but you may need a ladder for access.

Steps:

  1. Chimney Balloon: Insert a chimney balloon into the flue of an unused chimney to prevent draughts. Inflate the balloon until it creates a snug fit.
  2. Chimney Draught Excluder: Alternatively, use a chimney draught excluder, which is specifically designed to block draughts while allowing airflow to prevent dampness.

3. Efficient Heating: Making the Most of Your Resources

Maximizing the efficiency of your heating system can help keep your home warm without increasing costs.

Use Space Heaters Wisely

Space heaters can be effective for heating small areas, but they must be used efficiently.

  • Materials Needed: Space heaters with thermostat control and safety features.
  • Tools Required: None.

Steps:

  1. Strategic Placement: Place space heaters in the rooms you use most frequently. Close doors to retain heat within those rooms.
  2. Thermostat Control: Set the heater to a comfortable temperature and use the thermostat to maintain it, avoiding overheating the room.
Utilize Natural Sunlight

Harnessing natural sunlight is a free and effective way to warm your home.

  • Materials Needed: Light-colored curtains or blinds.
  • Tools Required: None.

Steps:

  • First, open curtains and blinds during the day to allow sunlight to enter and warm the room.
  • Then, close curtains at dusk to retain the heat that has built up during the day.
Heat Reflectors

Reflective panels can be placed behind radiators to direct heat back into the room.

  • Materials Needed: Reflective foil or radiator reflector panels.
  • Tools Required: Scissors and adhesive.

Steps:

  1. Measure and Cut: Measure the size of your radiators and cut the reflective material to fit.
  2. Attach: Secure the reflective foil or panels behind the radiators using adhesive.

4. Additional Tips for Winter Proofing

Rugs and Carpets

Adding rugs and carpets to your floors can help insulate and retain heat.

  • Materials Needed: Rugs or carpets.
  • Tools Required: None.

Steps:

  1. Cover bare floors: By placing rugs or carpets, particularly in areas where you spend a lot of time.
  2. Layering: Consider layering multiple rugs for added insulation.
Window Film

Window film is an affordable solution to improve insulation.

  • Materials Needed: Insulating window film.
  • Tools Required: Scissors, tape measure, and a hairdryer.

Steps:

  1. Measure and Cut: Measure your windows and cut the film to size.
  2. Apply and Seal: Apply the film to the window and use a hairdryer to shrink it, creating a tight seal.
Maintain Your Heating System

Regular maintenance of your heating system ensures it operates efficiently.

  • Materials Needed: None.
  • Tools Required: None.

Steps:

  1. Service Your Heater: Schedule an annual service for your heater to ensure it is working efficiently.
  2. Clean Filters: Clean or replace filters regularly to maintain airflow and efficiency.

Winter Proof Your House on a tight budget is entirely possible with the right approach and materials. 

By focusing on insulation, draught-proofing, and efficient heating, you can create a warm and comfortable living environment without breaking the bank. 

At Build it Gansbaai, we offer a wide range of building materials and tools to help you achieve your winter-proofing goals. 

Visit our store or explore our online store to find everything you need for your DIY projects. Stay warm and cozy this winter with our expert tips and affordable solutions!

Don’t forget to follow us on social media to stay updated on our latest specials and offers! 

Build it Gansbaai offers added value services in respect of hardware retailing. We embrace all activity within the building materials industry. Learn more about Build it Gansbaai.

Build it is a division of the SPAR Group Limited South Africa. 

Categories
Building Materials

A Building Material Odyssey, The Comprehensive Guide to 7 Types of Bricks.

When it comes to construction, the choice of building materials can significantly impact the outcome of a project. Bricks, in particular, have been a cornerstone in construction for centuries due to their durability, longevity, and fire-resistant properties. 

However, not all bricks are created equal, and understanding the characteristics of different types is crucial for any builder or DIY enthusiast. In this comprehensive guide, we will explore in-depth the seven types of bricks that everyone in the construction realm should be familiar with. 

Whether you’re working on a small backyard project or a large-scale structural endeavour, this guide from Build it Gansbaai aims to provide the knowledge you need to make informed decisions for your next construction masterpiece.

1. Burnt Clay Bricks

Overview:

Burnt clay bricks, also known as common bricks, stand as the most abundant type in modern construction. They find application in columns, walls, foundations, and various other purposes. 

These bricks are versatile but require plastering or rendering with mortar to enhance their strength, water resistance, and insulating ability when used in walls.

Classifications:

Burnt clay bricks are categorized into four classes based on quality. Fourth-class bricks are over-burnt and irregular, often used as aggregate. 

Third-class bricks are of poor quality and suitable only for temporary structures. Second-class bricks, though of moderate quality, have an irregular shape and rough surface. 

The best quality is found in first-class bricks, which have a standard shape, smooth surface, and enhanced durability and strength.

Best For:

The versatility of burnt clay bricks makes them suitable for a variety of construction purposes, making them the most commonly used bricks in modern construction.

2. Sun-Dried Clay Bricks

Overview:

Sun-dried clay bricks harken back to ancient construction methods, with origins dating as far back as 7,000 BC. Made from a mixture of loamy soil, water, and straw, these bricks might also include manure, clay, or sand for added strength. 

They are formed by pouring the mixture into moulds and drying them in a location protected from rain.

Strength and Use:

While sun-dried clay bricks are the least durable of brick types, they offer an affordable and DIY-friendly option for temporary structures. 

However, caution is advised, and they should never be used as load bearing supports or foundations due to their relatively weak structure.

Best For:

Sun-dried clay bricks are a cost-effective choice for temporary DIY structures, offering an authentic and historical touch to certain projects.

3. Concrete Bricks

Overview:

Concrete bricks, made from solid concrete, are a popular choice for internal brickwork, facades, and fences. 

They can be manufactured on-site with a standard mix of one part cement, two parts sand, and four parts aggregates. Adjusting the formula can result in increased strength for foundation use.

Customization:

Manufacturers can create concrete bricks in various sizes and shapes by pouring concrete into custom moulds. 

Professionals on-site can also produce them with the right mix, saving time and reducing costs for larger construction projects.

Best For:

Concrete bricks are commonly used for facades, internal brickwork, and outdoor walls. They are practical for both professional masons and DIYers, offering versatility and cost-effectiveness.

4. Engineering Bricks

Overview:

Engineering bricks are a favourite among structural engineers due to their high compressive strength and density, making them ideal for load-bearing structures. 

With low absorption capacity, these bricks resist moisture, preventing cracks, crumbling, or leakage.

Resistance and Applications:

The low porosity of engineering bricks also makes them resistant to chemicals that might damage other types of bricks. Consequently, they are regularly used in basement foundations, sewers, manholes, and retaining walls.

Best For:

Ideal for load-bearing structures, engineering bricks find their home in basements and other critical applications where strength and resistance to moisture and chemicals are paramount.

5. Sand Lime Bricks

Overview:

Sand lime bricks, made from a mixture of sand, lime, and sometimes colour pigments, offer high compressive strength. These bricks are commonly used for load-bearing walls due to their smooth finish and uniform appearance.

Mix and Finish:

Manufactured using heat and pressure to accelerate the chemical reaction, sand lime bricks require less mortar plaster, saving time and costs on projects. 

Additionally, their dense composition makes them a popular choice for acoustic insulation.

Best For:

Sand lime bricks excel in load-bearing walls and acoustic insulation projects. Their high strength and fire resistance contribute to their popularity in construction.

6. Fly Ash Bricks

Overview:

Fly ash bricks are a sustainable alternative to traditional burnt clay bricks, as they are made using class C or class F fly ash—a byproduct of coal-fired power plants. This not only reduces environmental impact but also helps reuse toxic metals found in fly ash.

Compressive Strength and Size:

These bricks exhibit high compressive strength and low water absorption, making them an excellent substitute for burnt clay bricks. However, their durability decreases with size, so they are generally available in smaller dimensions.

Best For:

Fly ash bricks are a strong and durable choice for construction, offering an environmentally friendly option by reusing materials from coal-fired power plants.

7. Firebricks

Overview:

Firebricks, also known as refractory bricks, are specially designed to withstand extreme temperatures. 

Made with fireclay, these bricks contain high levels of silica and alumina, enabling them to endure temperatures greater than 3,000 degrees.

Heat Resistance and Applications:

Firebricks are not just resistant to flames but also to low temperatures and rapid temperature changes. 

These properties make them perfect for applications such as lining chimneys, building brick grills, fire pits, wood-fired ovens, and any other project requiring high-heat resistance.

Best For:

Commonly used in projects involving intense heat, firebricks guarantee structural integrity under extreme temperature conditions.

How To Calculate Quantities

Quantity estimation of materials depends on the mix proportions of the concrete and is essentially required in any construction works. Let’s get started with the discussion of how to calculate bricks, cement, and sand in brick masonry.

Assuming,
  1. Volume of brickwork = 1 m3
  2. Grade of mortar = 1:6 (cement: sand)
  3. First class brick (190 mm x 90 mm x 90 mm)
  4. Thickness of mortar = 10 mm = 0.01 m
No. Of Bricks:

No. of bricks = (Volume of brickwork / Volume of one brick with mortar)

Volume of one brick without mortar = 0.19×0.09×0.09 = 0.001539 m3

Volume of brick with mortar = (0.19+0.01) x (0.09+0.1) x (0.09+0.1)

= 0.2×0.1×0.1 = 0.002 m3

No. of bricks = 1.0/ (0.002) = 500

Consider 10% to 15 % bricks as wastage.

Total no. of bricks = 500 + (10 x 500)/100 = 550

Quantity Of Mortar:

Volume occupied by bricks = No. of bricks x Volume of one brick

Volume of bricks = 500 x 0.001539 = 0.7695 m3

Volume of mortar = Volume of brickwork – Volume of bricks

Volume of Mortar = 1.0 – 0.7695 = 0.2305 m3

Quantity Of Cement:

Cement = (Dry volume of mortar x Cement ratio)/ Sum of the ratio

Dry volume of Mortar = 1.54 x 0.2305 = 0.35497 m3 (54% increment due to volume shrink after adding water)

Cement= (0.35497 x 1) / (1+6) = 0.35497/7= 0.05071 m3

Cement = 0.043795 x 1440 = 73.0224 kg

No. of cement bags = 73.0224 / 50 = 1.45 bags (1 bag cement contains 50 kg cement)

Quantity of Sand:

Sand = (Dry volume of mortar x Sand ratio)/Sum of the ratio

Sand = (0.35497 x 6)/7 = 2.12982/7 = 0.30426 m3

Sand = 0.30426 x 35.3147 = 10.7448 cft.

Summery:

Number of Bricks = 550

Cement = 1.45 bags of 50 Kg

Sand = 0.30426 m3 or 10.7448 cft.

Understanding the intricacies of these seven types of bricks is crucial for anyone involved in construction. 

Each type has its unique properties and applications, and choosing the right one can make a significant difference in the success of a project. 

Whether you’re a professional builder or a DIY enthusiast, Build it Gansbaai is your partner in providing high-quality building materials for your next construction venture. 

Visit our store today for expert advice, top-notch materials, and the tools you need to turn your vision into a lasting reality. 

Build with confidence, build with Build it Gansbaai.

Or log on to our online store, and shop from the comfort of your home: www.buildit-store.co.za

Follow us on social media, to stay up to date with our latest sizzling specials and promotional offers!

Build it Gansbaai offers added value services in respect of hardware retailing; embracing all activity within the building materials industry, focusing specifically on the building of; urban, township, rural housing as well as all home improvements and do it yourself.