Categories
How To

How To Change a Tap Washer

Not only is a dripping tap annoying, but it also wastes precious water. The Water bylaws make house owners responsible for the maintenance of their own water systems, today we will discuss how easy it is to change a leaking tap washer.

Tools and Materials Required:

  • Step Ladder
  • Small Screwdriver
  • Wire strippers
  • Sticky Tape
  • Water pump plier (Optional)
  • Spanner (Optional)
  • Hammer (Optional)

Before You Start

Taps usually leak due to a faulty washer or a worn seat against which the washer is compressed. There are several different types and sizes of tap washers, so do not start with the changing of the washer unless you know what type of washer you need.

Turning Off the Water

Modern installations have a service valve fitted below each tap that makes it easy, all you need to do is turn off the valve that isolates the tap from the water supply.

If your installations are relatively old and you do not have service valves, you will have to turn off the mains water supply. This stops the water from flowing to all taps and do not forget to turn off your geyser!

Tip: Place the plug in the sink waste and block the overflow, as both have a nasty habit of swallowing screws and other small parts.

Let’s Get Started

Once the water supply is cut off, turn the tap on to allow the remaining water to drain. Remove the capstan head retaining screw, this will be in the side of the capstan head or under the cap in its center.

The cap might unscrew, or it may be prised out with a small screwdriver. If the capstan will not pull off, turn the tap on completely, slide a spanner over the spindle under the head, and gently tap the spanner upwards with a hammer.

Tip: Protect the basin with towels in case the head flies off and damages something.

Remove the tap cover or shield. If the shield will not undo, wrap a strip of inner tube around it to protect the finish and apply pressure using a water pump plier.Undo the large hexagon nut and remove the body, then remove the old washer from the jumper, this may be held in place by a nut. 

If so, then hold the jumper with pliers and undo the nut with a small spanner, now replace the washer.Check the washer seating for pitting, which will stop the washer making a perfect seal. If it is not perfectly smooth, it needs attention.

A plastic grommet may be inserted to make a new seat, by pushing the grommet into the hole. By Reassembling the tap and screwing the handle down, this will bed the grommet and create a new seat.

All done, easy-peasy!

Please feel free to ask any of our experienced salespeople for assistance or advice when purchasing a product, we are here to make your shopping experience as memorable as possible.

Build it Gansbaai offers local delivery, supplying the greater Overberg area with building materials, do-it-yourself home improvement tools, and expert advice.

Please follow us on social media to stay up to date with our latest sizzling specials and promotional offers! 

Visit us in store or log on to our online store and shop from the comfort of your own home: www.buildit-store.co.za

Build it Gansbaai offers added value services in respect of hardware retailing; embracing all activity within the building materials industry, focusing specifically on the building of; urban, township, rural housing as well as all home improvements and do it yourself.

Build it is a division of the SPAR Group Limited South Africa.  voluntary trading group of individually owned retail stores with more than 10 000 employees across the group, we currently have stores in South Africa, Namibia, Swaziland, Lesotho and Mozambique with plans to expand into Botswana and Zambia in the near future. We view ourselves not only as a supplier of materials, but as a partner to our valued customers in accomplishing their building or renovating projects

Categories
Do It Yourself Natural Stone

The Timeless Beauty of Natural Stone: Travertine and Porcelain

There is nothing that speaks, timeless elegance, quite like natural stone. Each slab of stone has its own unique fingerprint, each piece is different, in pattern and colour. For this reason, a person who wishes to make a statement in stone, would personally select the slabs from which the tiles would be cut to size.

With slabs cut from the same block of rock, you can keep the pattern consistent, throughout your home. This is an impressive achievement, usually found in the home of someone, with a passion for art.

Travertine Tiles

Travertine Tiles one of the most popular stones used for building materials, it will look fantastic wherever you install it. Travertine creates a classic, fresh and functional atmosphere while still feeling warm and welcoming, it is known for its marble-like texture and attractive earthy tones.

Our trusted supplier ensures that we can select the very best affordable quality travertine products, purchased from a Travertine Quarry in Turkey.  

Travertine Tiles come in two forms:

Unfilled Travertine Tiles: Travertine in its porous state with naturally occurring holes, popular for outdoor use. Filled Travertine Tiles: Most commonly, the porous holes in travertine are filled with a mixture of hardener and dust by-products, from the cutting and honing process, for a perfect colour match.

Travertine Finishes

Honed Travertine Tiles: Honed is a flat, satin smooth, low shine, matte finish. Over the years, Honed travertine has proven to be the finish of choice, for the majority homeowners. Polished Travertine Tiles: The travertine is smoothened and polished to a shiny, reflective surface like marble. This finish is most preferred in commercial applications.

Brushed Travertine Tiles: Brushed is a rough surface texture with a matte finish. It has an antique feel and is less slippery compared to a honed or polished finish, while being gentle on the feet.

Tumbled Travertine Tiles: Tumbled is the most natural finish, highly textured finish, with no shine and edges, rounded with a worn appearance that resembles ancient stone. 

You will most often find Tumbled travertine in outdoor applications. Travertine colours range from soft ivory and pale creamy-white to rich golden shell shades of walnut and honey, silvery greens, rustic reds, deep mocha, and coffee shades. Travertine products available include tiles, cladding, and mosaics. (Basins and Slabs available on request).

Porcelain Tiles

Porcelain tiles are a manufactured product, created to mimic the look and feel of natural stone. To the untrained eye, some high-quality porcelain tiles, can look like natural stone, but an expert would immediately be able to detect the difference.

Build it Gansbaai Natural Porcelain Tiles Stone

Porcelain tiles are not individually unique, as marble and granite are, in variation. These tiles come highly recommended for interior floors and walls that endure heavy traffic, known for being strong, resistant to chipping this includes hallways, kitchen floors, and commercial applications.

Porcelain paving slabs are always a safe option for outdoor tiling, of the non-synthetic floor tiles available, porcelain pavers are the most slip resistant. The manufacturing process utilizes a very dense clay and granite which is non-porous, as a result, water does not soak into the concrete bed easily and evaporates from its surface. 

This isn’t the case with most other stone tiles.Please feel free to ask any of our experienced salespeople for assistance or advise when purchasing a product, we are here to make your shopping experience as memorable as possible.

Build it Gansbaai offers local delivery, supplying the greater Overberg area with building materials, do-it-yourself home improvement tools, and expert advice.

Please follow us on social media to stay up to date with our latest sizzling specials and promotional offers! Or log on to our Build it online store and shop from the comfort of your home: www.buildit-store.co.za

Build it Gansbaai offers added value services in respect of hardware retailing; embracing all activity within the building materials industry, focusing specifically on the building of; urban, township, rural housing as well as all home improvements and do it yourself.

Build it is a division of the SPAR Group Limited South Africa. A voluntary trading group of individually owned retail stores with more than 10 000 employees across the group, we currently have stores in South Africa, Namibia, Swaziland, Lesotho and Mozambique with plans to expand into Botswana and Zambia in the near future. We view ourselves not only as a supplier of materials, but as a partner to our valued customers in accomplishing their building or renovating projects.

Categories
Must Have

Five Power Tools Every Man Needs

Back in the time of the cave man, humans have been using crude tools to make basic objects, such as arrowheads and wheels. However, it wasn’t until the invention of electricity, the arrival of power sources, that we saw a real change in what makes humankind different and the usefulness of power tools.

Hand-held tools are great, but for everything else, there is a power tool available to make every job a lot faster and much easier.

We recommend only purchasing a power tool if you are going to use it on a regular basis, power tools can be expensive and complicated to a degree. Any of the power tools mentioned in this article would be a perfect gift, for a father or the special man in your life.

The Drill

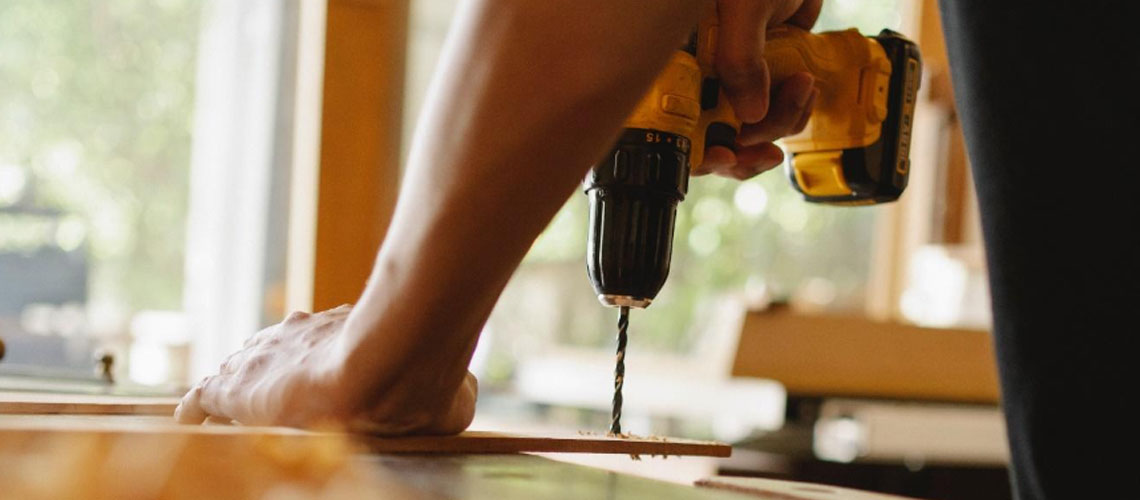
When it comes to carpentry, masonry or metal work, the drill is a toolbox favourite, there are many different types available, but the most popular type seems to the cordless drill.

The drill will be one of the best investments you will make in your power tool collection, just attach the rechargeable battery and you are good to go.

Compared to cordless screwdrivers, cordless drill drivers tend to have higher-voltage batteries and more efficient gear systems. This means that they can deliver greater levels of torque at higher speeds. On average, cordless drill drivers can deliver around 50Nm (Newton metres) of torque.

The Sander

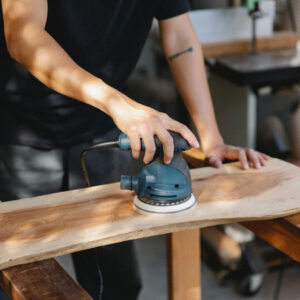
An electric sander is a power tool used to smooth and finish surfaces. The belt sander and the orbit sander are the two basic types, both types come cordless or corded, and are used in woodworking at the end of a job.

Build it Gansbaai Five Power Tools Every Man Needs

The belt sander is the more powerful of the two, capable of doing large areas quickly, while the orbit sander, though small in size, can give any type of wood a beautiful smooth finish. 

You can use an electric sander for a variety of tasks in many industries, including woodworking and auto body repair.

The Saw

Another favourite of carpenters and craftsmen alike, is the saw, there are two distinct types, the reciprocating, and the circular saw. However, the way they are used will be slightly different, even though they are basically designed to cut things.

The reciprocating saw is like a hand saw on steroids, by mimicking the commonly used hand saw, these tools can cut through just about anything and are easier to use than circular saws.

The circular saw is almost strictly used to cut thick pieces of wood in a straight line, circular saws come fixed on a stand, or as handheld devices, therefore doing precise, complicated patterns is not possible.

The Grinder and Oscillator

Although the grinder is a speciality tool, we have added it to our list, as it can be a very useful tool to have. This tool basically replaced the file, in the metal working industry, a grinder can be used to cut or shave down metal.


The oscillator on the other hand is the surgeon’s scalpel of the power tool world, it can go places where the grinder can’t. Not only that, but it can also handle different types of attachments such as sanders, small wood cutters, scraping attachments etc.

A must have for DIY’s, masons, blacksmiths, and carpenters alike, automatically making it one of the most popular power tools out there.

The Chainsaw

The trusty chainsaw, they can be gas powered or electric and there are even cordless electric chainsaws, that are very quiet, and non-polluting.

The chainsaw is one of the most fun power tools to operate, for lumberjacks and anyone who does any type of landscape related work.

They come in all different sizes and powers, the larger ones are used to cut down large trees, and smaller ones for trimming around the garden. 

This monster tool was made famous in movies like, the Texas Chainsaw massacre, anyone who says they wouldn’t like using one is lying.

Might want to start dad with a cordless drill first😊

Most products and materials used in this article are available instore from Build it Gansbaai/Hermanus or on the online store www.buildit-store.com with free local delivery in the Overstrand area, for building materials, do-it-yourself home improvement tools, and expert advice.

Please send us a photo of your completed creation, we would love to see it, you can upload your images in the comments section!

Follow us on social media, to stay up to date with our latest sizzling specials and promotional offers!

Build it Gansbaai/Hermanus offers added value services in respect of hardware retailing; embracing all activity within the building materials industry, focusing specifically on the building of; urban, township, rural housing as well as all home improvements and do it yourself.

Categories
How To

Laying Paving Slabs

Laying paving slabs involves a great deal of physical labour, and in terms of technique, it is much more complicated than tiling a wall. 

Planning, accurate setting out and careful laying, especially during the early stages, will help you achieve your desired results.

Tools Required:

  1. Wooden Pegs
  2. Spirit Level
  3. Club Hammer
  4. Wooden Straight Edge
  5. Garden Roller
  6. Brush

Material Required:

  1. Pavers
  2. Mortar
  3. Gravel
  4. Sand
  5. Hardcore (broken bricks or crushed stone)

Setting Out the Paving Area:

Whenever feasible, plan an area of paving so that it can be laid with whole slabs only. This eliminates the arduous task of cutting units to fit. 

Use pegs and string to mark out the perimeter of the paved area and check the measurements before you excavate. 

You can use a straight wall as a datum line and measure away from it, to allow for a 100mm to 150mm margin of gravel between the wall and paving.

TIP

A gravel margin not only saves time and money by using fewer slabs, but also provides an area for planting climbers and for adequate drainage to keep the wall dry. It is a rule that all paving must be installed 150mm below a damp-proof course, to protect the building.

Marking out an area simply involves accurate measurement, as paving slabs are made to near precise dimensions, and keep an allowance of 6mm to 10mm gaps between the slabs. Some slabs are cast with sloping edges to provide a tapered joint and should be buttered edge to edge.

Preparing A Base for Paving

Paving slabs must be laid upon a firm level base, but the depth and substance of that base depends on the type of soil and the proposed use of the paving. Compact the soil with a garden roller and then spread the sand with a rake and level it by scraping and tamping with a length of timber. 

To support heavier loads, or if the soil is composed of clay or peat, lay a subbase of firmly compacted hardcore (broken bricks or crushed stone) to a depth of 75 to 100mm before spreading the sand to level the surface. If you plan to park vehicles on the paving, increase the depth of hardcore to 150mm.

Laying Paving Slabs

Lay a first-size blob of mortar under each corner and one more to support the center of the slab. 

If you intend to drive vehicles across slabs, lay a continuous bed of mortar about 50mm thick. Lay three slabs at a time, inserting wooden spacers between. 

Level each slab by tapping with a heavy hammer, using a block of wood to protect the surface.  Check the alignment. 

Gauge the slope across the paving by setting up data pegs along the high side. Drive them into the ground until the top of each corresponds to the finished surface of the paving, and then use a straight edge with a packing piece under one end to check the fall on the slabs.

Don’t Walk on the paving for two or three days, until the mortar has set. If you must cross the area lay planks across the slabs to spread the load. 

To fill the gaps between paving slabs, brush a dry mortar mix into the open joints. Remove any surplus material from the surface of the paving, then sprinkle the area with a very fine spray of water to consolidate the mortar. 

Please Note: Avoid dry mortaring if heavy rain is imminent, it may wash the mortar out.

Did You Know?

What is the difference between Mortar Mix and Concrete Mix?

The terms cement, concrete, and mortar are often used interchangeably, but they are different materials with different uses. Though both mortar and concrete are widely used building materials, they cannot be substituted for each other without compromising the integrity of a build.

Mortars with a high water-cement ratio bond best. 

This is the opposite of concrete, where concrete mix is formulated for strength and lower water content makes it stronger and more effective for its purpose. 

Additives or plasticizers may be added to mortar mixes to increase their flexibility.

All the Tools and Materials required for Laying Paving Slabs are available for purchase and delivery from the Build it Online Store www.buildit-store.com

Please send us a photo of your completed project, we would love to see it, you can upload your images in the comments section!

Remember to plan your next DIY project with Build it Gansbaai, get the job done right, first time.

Follow us on social media, to stay up to date with our latest sizzling specials and promotional offers!

Shop online www.buildit-store.co.za or visit us instore at Build it Gansbaai, your local building materials partner, helping you make home building simple! 

Build it Online store offers Free local delivery, supplying the Overstrand area with building materials, do-it-yourself home improvement tools, and expert advice.

Build it Gansbaai offers added value services in respect of hardware retailing; embracing all activity within the building materials industry, focusing specifically on the building of; urban, township, rural housing as well as all home improvements and do it yourself.

Categories
How To

How to Build a Stone Fire Ring

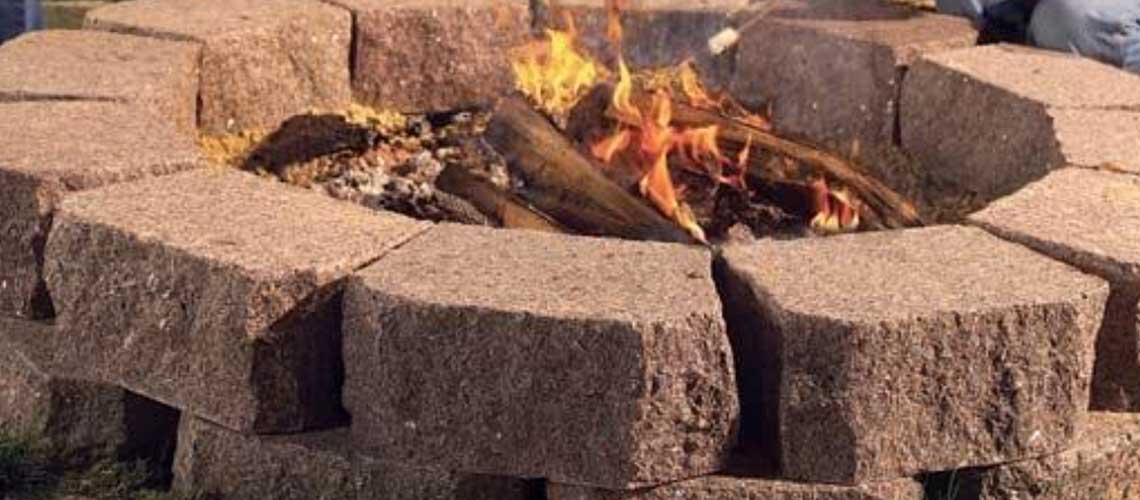
We will show you how to build this simple, safe and durable fire ring over a weekend in your own backyard to entertain friends and family this Spring.

Planning your Outdoor Stone Fire Pit

Having the necessary Tools and Materials on hand saves time and frustration. 

Tools Required:
  • Garden rake
  • Level
  • Safety glasses
  • Sledgehammer
  • Spade
  • Tape measure
  • Wheelbarrow
Materials Required:
  • 1-1/2 yards of sand?
  • 20 sq. meters of flagstone
  • 24 granite retaining wall stones (6-1/2 x 8 x 14 in.)
  • Marking spray paint
Step 1

Mark your fire ring and patio

Begin by making sure there are no electrical wires or water pipes running over the area you are planning your fire ring. 

Choose an area that’s about 5 meters in diameter and relatively flat. Make sure that your fire ring is not too close to buildings and bushes, you do not want to set the neighbourhood on fire😉

Drive an iron rod directly into the centre of the area you have chosen to build your fire ring.  Tie a piece of masking tape or rope around the rod and measure out 2,5 meters. With a can of spray paint mark out a 5-meter radius circle.     

Step 2

Remove any grass/plant material and enough sand with a good shovel, so the paving stones you’ve chosen are flush with the surrounding grass when set in 3cm of sand.

Drive a 15cm. landscape spike beside the centre iron rod until it is 5cm below the sod level. Drive six additional spikes about 1 meter away from the centre, spacing them evenly around the centre. Level the top of each spike with the centre one, then spread sand in the circle flush with the tops of the spikes.

Lay the stones in a circle to determine how large you want to make the ring. There is no right or wrong here. A 1-meter inner diameter works well, but you can adjust the size according to your preference. Measure the radius of the circle and then mark this circle at the centre of your fire ring.

For safety and stability reasons, limit the height of the ring to two rows of stone. If you go higher, keep in mind that the stones can fall, so be sure to use large stable stones!

Make sure that when you set your base stones, you have a level bed of sand to keep your base stones stable. 

Once the first level is perfectly aligned the second row of stones are easy to place.

Step 3

Spread 3cm of sand over the sitting area and fit the first flagstone tightly to the fire ring, twisting it into the sand till firmly set and the joints are tight.

You can use various materials for an attractive sitting area, for low maintenance purposes, we have chosen flagstones for this project.  Once the grass starts growing in-between the flagstones it is easy to maintain by running a lawnmower over the stones to trim the grass.

This is where you can get creative with the look and feel of your fire ring.  You could add colourful stones, wood chips, moss or any ground coverings of your choice.

This is your masterpiece, go crazy😉

Step 4

The final step to this project is to raise the level of sand inside your fire ring to your specifications.

stone fire pit

Well Done!

Only one thing left to do, Pack the wood, Nou gaan ons Braai!😉

Please send us a photo of your new fire ring, we would love to see it, you can upload your images in the comments section!

Plan your next DIY project with Build it Gansbaai and get the job done right, first time.

Please follow us on social media to stay up to date with our latest sizzling specials and promotional offers!

Or, log on to our online store and shop from the comfort of your home: www.buildit-store.co.za

Build it Gansbaai offers local delivery, supplying the greater Overberg area with building materials, do-it-yourself home improvement tools, and expert advice.

Categories
News

Build it Gansbaai – Launches Their New Showroom!

Build it Gansbaai the market leader in Gansbaai building supplies and construction materials, are proud to unveil their new Showroom!

On Saturday, 3 October 2020 Build it Gansbaai launched their new showroom with a ceremonial ribbon-cutting ceremony, welcoming both the community and media. 

This new expansion had been on the cards for the past four years but as we all know in retail, things can get manic and crazy at times, retail never sleeps! 

The vision was revived three months ago when Dylan and Clayden Burger took over the management of Gansbaai Build it, from their parents Eddie and Silvana Burger.

The new showroom is located on prime property in the industrial area on the outskirts of Gansbaai, opposite the main store, where the old Pieter Deon showroom used to be. While the Covid 19 Lockdown destroyed many businesses, fortune continued to smile on this family.

This perfectly located property was exactly the opportunity Dylan and Clayden had been waiting for, it was time to make this long-awaited expansion a reality.

The project came to life within a mere three months, working round the clock to make their deadlines.  

Twenty-Four Hours before Launching the showroom, exhausted people were still running around with power tools, drilling, fixing, decorating and moving products, it was quite a sight to behold!

I am sure you will agree, this new stylish showroom has much to offer the local community who travel far distances to purchase the products which are now locally available.

The Build it Gansbaai Showroom has ready to assemble kitchen cabinets in various colours and profiles that can be purchased straight off the shelf.  The kitchen shop is delightful, you feel like an interior designer while you mix and match different colours, profiles, and finishes.  

Custom make your kitchen by choosing from a variety of kitchen countertops, that will add style and elegance to every kitchen. Modern kitchen cupboard handles, elegant taps, mixers and soft close door hinges, add those final little touches of luxury you deserve.  

This is your local one stop kitchen shop, you can mix and match as it pleases you, there is something for every budget and taste.

From 12 October 2020 Build it Gansbaai will offer a new Board Cutting Service for a small fee, so bring your cutting list and they will cut to your specifications.  

But wait there’s more…

There is a new bathroom section with a wide range of luxury basins, taps, mixers, bathtubs, showers, bathroom products and accessories for every style home.Whether you want a square or curved shower, a standard rectangular or a Victorian bathtub, the local community will be spoilt for options to choose from.

The lifestyle department offers modern and contemporary light fittings to light up every corner, ceramic tiles and beautiful laminated flooring that will add warmth to every home. Quality appliances both large and small from trusted brands are on show, ovens and hobs, indoor fireplaces, gas barbecues and many more to be found.

This is any home maker or renovator’s playground, pop into the Build it Gansbaai showroom to see what they have to offer you today.

As Dylan and Clayden always say, “Passion for the business and people involved is key to offering the Gansbaai community service excellence they have become so accustomed to over the years”.

Plan your next DIY project with Build it Gansbaai and get the job done right, first time.Please follow us on social media to stay up to date with our latest sizzling specials and promotional offers!

Or, log on to our online store and shop from the comfort of your home: www.buildit-store.co.za


Categories
Do It Yourself

How to Build an Easy DIY Desk for Children.

We will show you step by step how to build a wall mounted desk for your child in less than a day.

Step 1

With this easy to follow project, we will have you feeling like a DIY professional in no time!

To get started, simply choose an empty wall in your child’s room where they will be doing their homework and follow these easy steps.

Below you will find a list of tools and materials required to complete this project. 

Tools Required

  1. Carpenter’s pencil
  2. Clean cloths
  3. Electric sander
  4. Level
  5. Paint brush
  6. Power drill
  7. Protective gloves
  8. Tape measure

Materials Required

  1. 180-grit sandpaper
  2. 19-1/2-in. metal shelf brackets (2)
  3. 60cm x 1 Meter pre-cut wood board (1)
  4. 5cm wood screws (6)
  5. 5/8-in. wood screws (6)
  6. 80-grit sandpaper
  7. Wood conditioner
  8. Wood stain

Step 2

Mark the Desk Height

The desk hight should be about 65cm for a young child but keep in mind that children grow so we have set the desk hight at 75cm.

Measure the height of the desk against the wall and mark the spot with a pencil.

You will need about 25cm between the top of the chair and the bottom of the desk for comfort.

Step 3

Attach Brackets

Use a level to make sure that your brackets are straight, then hold the bracket in place to secure.

Using your power drill and 5cm wood screws, attach the bracket to the wall.

So easy! 

Now let’s do the second bracket!

Step 4

Sanding the Desktop 

The objective of sanding wood is to remove mill marks, and other flaws that could have been introduced at the factory or in handling.

Sanding makes the surface of the wood smooth, improving the appearance and bringing out the natural beauty of the wood. 

Prepare your 60cm x 1meter board which is to become the desktop.

Now sand the wood in the direction of the wood grain, which helps camouflage any scratches, with 80-grit sandpaper.  

Then go over the wood again with 180-grit sandpaper;

Wipe the dust away with a dry clean cloth and rub your hand over the wood.

Is the wood perfectly smooth? 

Great! Let’s continue.

Step 5

Conditioning the Desktop

The reason we treat the surface of the wood with Pre-Stain Wood Conditioner is that it helps prevent streaks and blotches by evening out the absorption of oil-based stains. 

Wood conditioner can be applied on any wood for an even finish but is especially necessary when working with soft or porous woods like pine, alder, birch, and maple.

With your protective gloves on, apply wood conditioner to the Desktop with a clean cloth.

Leave to dry for a few minutes and you can move on to the next step.

Step 6

Staining the Desktop

What is the purpose of wood stain and how does it work?  

Wood stain is a type of paint that is used to colour wood by soaking pigment into wood fibers with a solvent and then having it set and bind to the wood. Stain works by saturating colour into the wood itself, rather than applying a layer of colour over the surface of wood.

Perhaps the most common reason to use stain as protection is against ultraviolet light. Many stains help reflect UV light, which prevents wood surfaces from fading and losing their colour.  

Using a clean cloth, apply the colour of wood stain you have chosen.

Always apply the stain in the direction of the wood grain for an even finish.

Let the stain dry for a few hours then repeat on the other side.

Step 7

Attach the Desktop to the Brackets

And now for our final step!

Once you have placed your board on top of the wall brackets, attach the board from underneath the desk by using 3 of your 8/5-in. wood screws.

Almost done, now let’s do the other side.

Good Job!

The only thing left to do is pull up a chair and decorate!

Categories
Our Story

Build it Gansbaai – Building Materials and more to make home building simple!

Build it Gansbaai are the Market Leaders of Gansbaai Building Supplies, Construction Materials, and DIY for the local Community.

Living in Gansbaai it soon became clear that there was a gap in the market and a dream was born. In February 2004, Build it Gansbaai established by Eddie and Silvana Burger, became a reality.

The popular Gansbaai building supplies, construction materials, and hardware store has its core values aligned in Family, Entrepreneurship, and giving back to the community that supports them.  

This is the reason for their success story! 

Therefore it comes as no surprise that growing up in the business, Dylan and Clayden Burger following in their parents footsteps have played their part in this success story, as they too share a passion for the business and the people involved.

One of the ways the Burger family gives back to the community is through ongoing sponsorship of under 13 soccer development, the sinking of water boreholes and renovating schools in Gansbaai. 

“We are building a better future for our youth.”

An independently owned building materials company, offering a personalized service, Build it Gansbaai is part of a group of 374 independently owned retail stores that has been serving their communities for over 32 years across Southern Africa.

Due to the store’s prime location, friendly staff, and local delivery, Build it Gansbaai, can be found in the industrial area on the outskirts of Gansbaai, supplying the greater Overberg area with building materials, do-it-yourself home improvement tools, and expert advice.

At Build it Gansbaai they do not only see themselves as a supplier of building materials but as partners, in accomplishing all local building and renovating projects in their community.  Focusing primarily on the building of urban and township housing as well as all your Do-It-Yourself (DIY) home improvements. 

Build it [ADD LINK] is a division of the SPAR Group Limited South Africa. [ADD LINK] A voluntary trading group of individually owned retail stores with more than 10 000 employees across the group, we currently have stores in South Africa, Namibia, Swaziland, Lesotho and Mozambique with plans to expand into Botswana and Zambia in the near future. We view ourselves not only as a supplier of materials, but as a partner to our valued customers in accomplishing their building or renovating projects.

Congratulations!

New Management

After many years learning the family business, Dylan and Clayden Burger have taken over the reins of Gansbaai Build it, from their parents Eddie and Silvana Burger.

New management, new vision and an appetite for future trends, these brothers are paving the way for fresh ideas! 

Passion for the people and business is key to offering the Gansbaai community the same service excellence they have become so accustomed to over the years.

But wait there’s more…

WE ARE EXCITED TO PRESENT!

Build it Online

What can be more convenient than being able to order all your building supplies, construction materials and DIY products, online?  

If the second wave of COVID 19 ever strikes, Build it Gansbaai is ready with a fleet of vehicles to deliver your building materials directly to your front door or construction site. 

At Build it Gansbaai, they understand that wearing a mask is uncomfortable and sneezing in your mask can be very unhygienic😉

You can now place an order from any smart device of your choosing, whenever, wherever you choose.

Life happens so if you are running late, order online for collection or delivery, whatever your requirements are, Build it Gansbaai is here to assist you.

With 4 Billion people currently online, and an estimated 8 Billion people online by 2025 globally, this reality is what fuels Dylan and Clayden Burger to preserve their legacy in the twenty-first century.  

To ensure you have a stress-free online shopping experience, we will have a look at the most common Frequently Asked Questions, to set your mind at ease.

Is online shopping safe?

Yes. We have taken every precaution to ensure your personal details are safe with us. All sensitive information you provide is encrypted using industry-standard Secure Sockets Layer technology, and we utilise a leading South African payment processor. 

What is Online Security?

Online Security is a Certificate Authority that essentially secures the Build it website by validating security certificates with our affiliates to ensure that our connection both to and from are secure at all times.

What are the requirements for a Password?

Build it attempts to make your online shopping experience as secure as possible. The password entered on registration must be alpha-numeric (that is, a mix of letters and numbers) and must be a minimum of 6 characters in total. Your password needs to be a mix of 1 uppercase, 1 number and 1 special character.

Will my Password expire?

For your convenience we have maintained a static password that will not expire. However, should you wish to change your password, you can either change it in your ‘My Account’ section or reset it following the password reset process.

How do I reset my Password?

There is a “Forgot Your Password” link on the login page. You will be prompted to enter an email address to send a password reset email which will allow you to reset your password. Please ensure that you enter the email address you registered with. If your email address has changed, please contact us on info@buildit-store.co.za.

How can I see how much stock is available?

We do our best to source stock even if it is low, but there may be cases where we will need to contact you as this may lead to extended lead times. Unfortunately, due to the nature of our business, we cannot guarantee the stock indicated on the site is in-store. However if you want to confirm the quantity available, it’s best to contact us on info@buildit-store.co.za.

Can you guarantee stock?

As we are competitively priced and our stock sells on demand, we cannot guarantee stock. However, we will try our best to source the items for you. We will be in contact with you should we encounter any problems with stock.

Do you Deliver?

Yes, we do.  We deliver in Gansbaai and the greater Overberg area for a delivery fee.

What are Cookies?

A cookie is a piece of information that is deposited on your computer’s hard drive by your web browser when you use our computer server. The cookies enable us to recognise you and give us information about your previous visits. Most browsers accept cookies automatically, but usually you can alter your settings to prevent automatic acceptance. If you choose not to accept cookies, this may disable some of the features of our website. The information that we collect is anonymous and not personally identifiable. It does not contain your name, address, telephone number or email address.

What internet browsers are supported?

Our website is built to work across all mainstream Internet browsers. But for optimal browsing experience, we recommend:

  • Internet Explorer – Version 10 and later (Windows only)
  • Firefox – Version 24 and later (Windows, Android & Mac)
  • Google Chrome – Version 30 and later (Windows, Android & Mac)
  • Safari – Version 6 and later (Mac & iPhone only)

Is the Online Build it Store compatible with SMART devices? 

Yes, as our website is designed to be used across current mainstream mobile devices, such as tablets (e.g. Apple iPad or Samsung Galaxy Tab) or mobile phones (e.g. Apple iPhone, Samsung Galaxy S range, Microsoft Lumnia, or Blackberry Q10).

Please visit our website (www.buildit-gansbaai.co.za), for an in-depth look at our policies and terms and conditions.