Categories
How To

Mastering the Art of Resin-Infused Woodworking: A Comprehensive Guide

For woodworking enthusiasts seeking to push the boundaries of their craft, the integration of resin has emerged as a transformative technique, adding a unique blend of aesthetics, durability, and versatility to wooden creations. 

In this extensive guide, we will explore the remarkable potential of incorporating resin into woodworking, providing valuable insights and detailed tips to assist you in creating truly remarkable resin-infused masterpieces.

Understanding Resin and Its Characteristics

Resin, whether synthetic or natural, stands as a versatile material that can be poured, moulded, or shaped to produce diverse finishes and effects.  Epoxy resin, in particular, is widely favoured in woodworking for its robustness, transparency, and strong adhesion to wood, making it an ideal choice for creating stunning, long-lasting projects.

Selecting the Appropriate Resin

The success of any woodworking project with resin hinges on the careful selection of the right resin. Opt for epoxy resin specifically formulated for woodworking applications, ensuring optimal bonding strength and longevity. Consider crucial factors such as curing time, clarity, and UV resistance to make an informed choice that aligns with the unique requirements of your project.

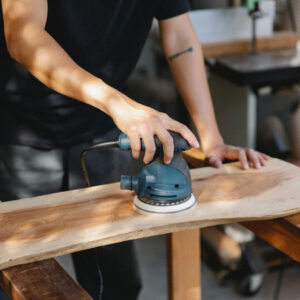
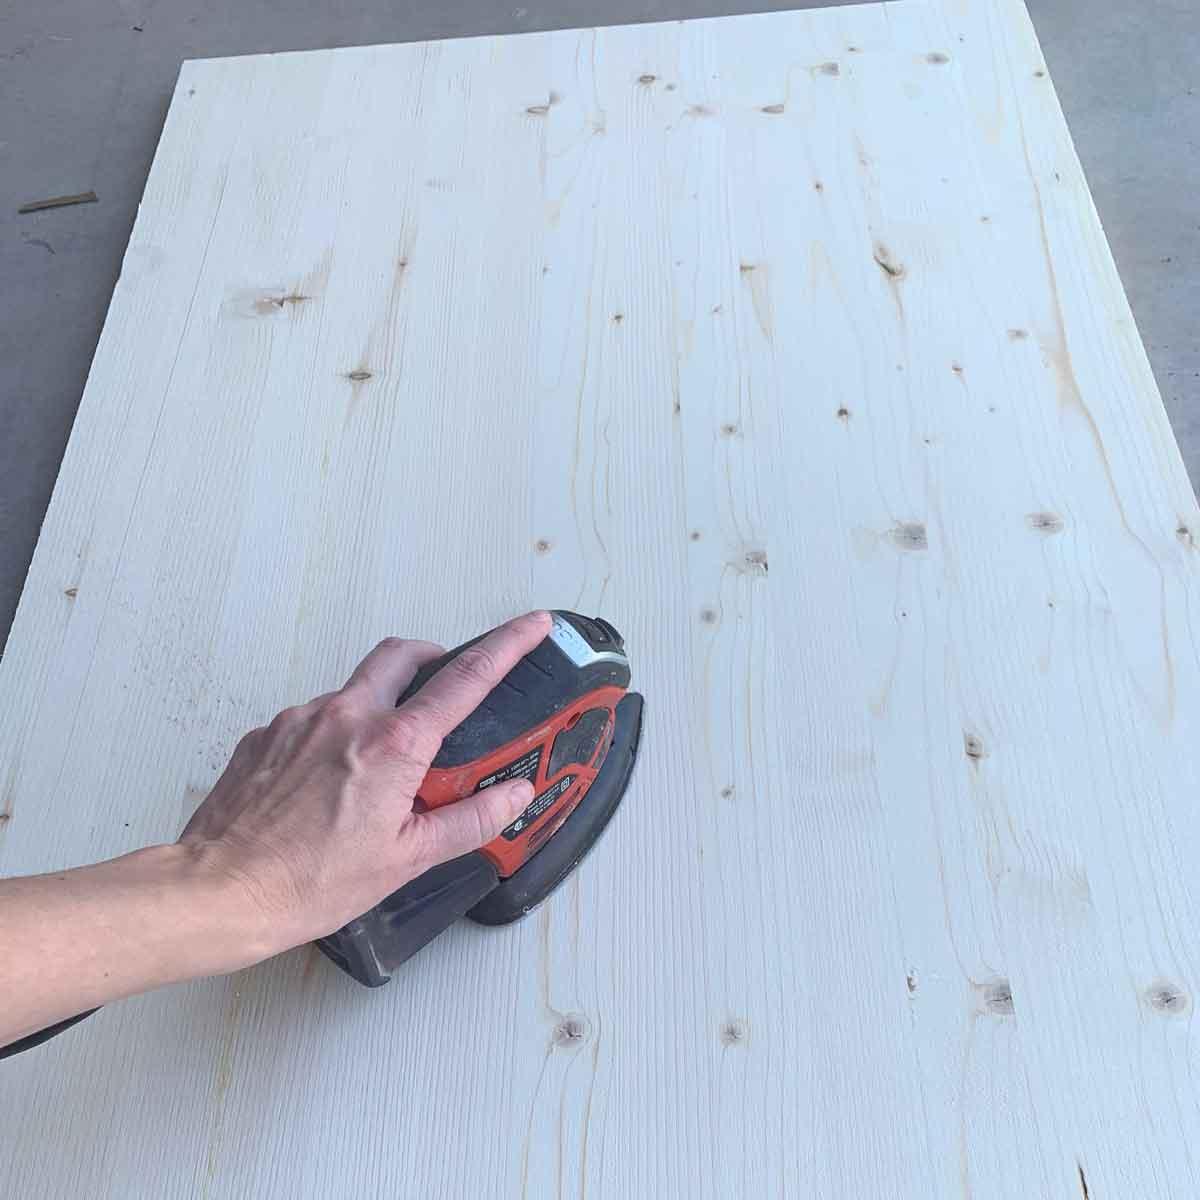
Prepping the Wooden Surface

Achieving a flawless resin finish begins with proper preparation of the wooden surface. Thoroughly sand the wood to create an even surface, eliminating any dust or debris that could compromise the final result. 

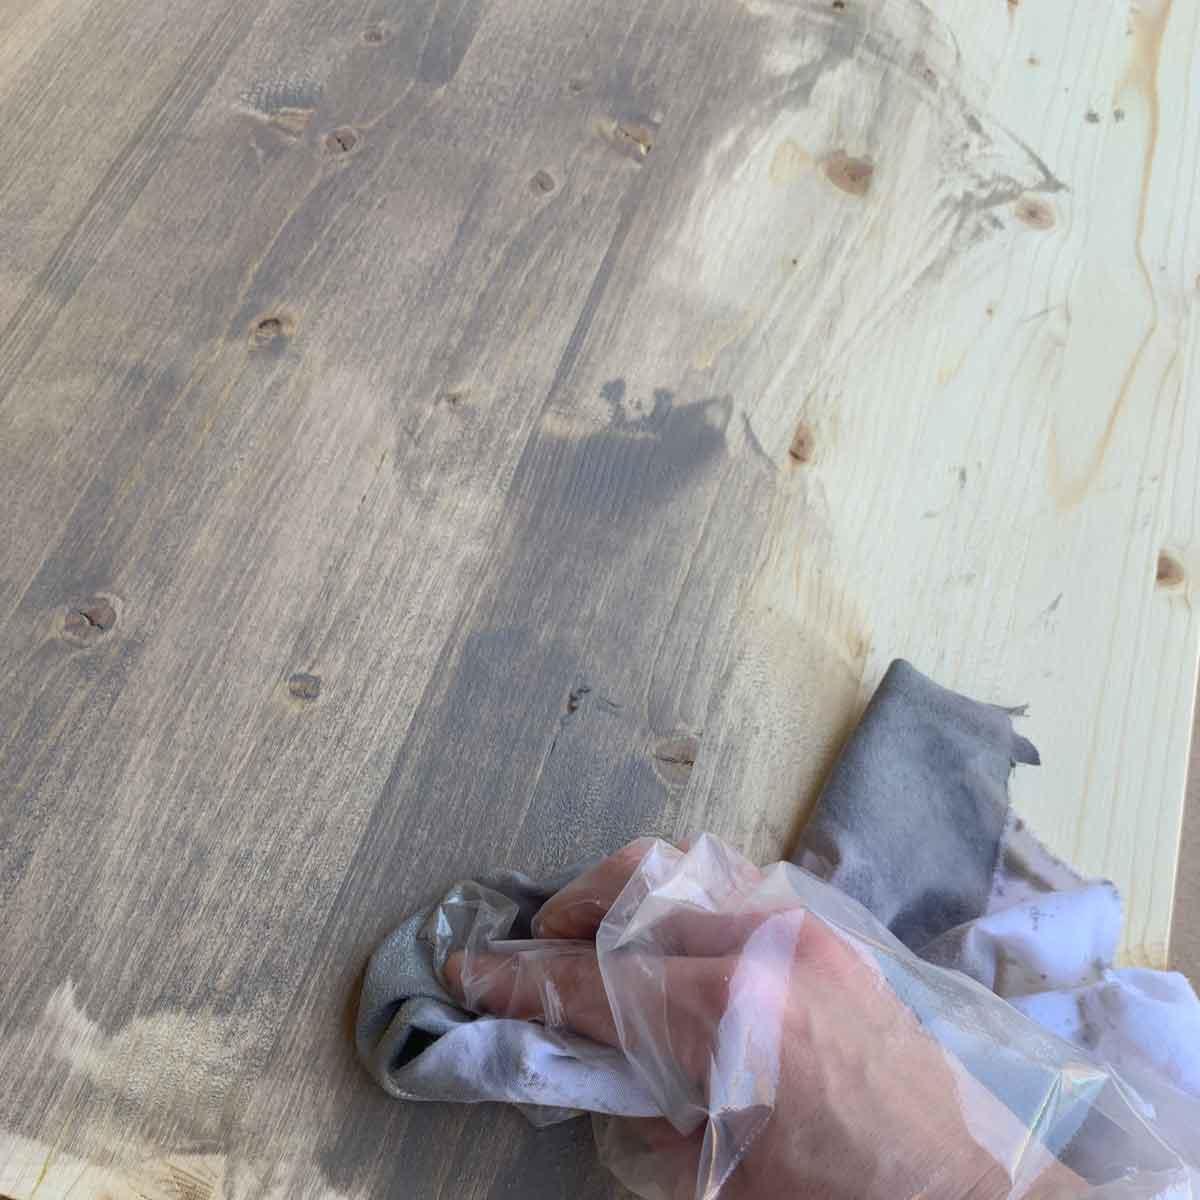
The application of a sealant or primer is essential to prevent the formation of air bubbles during the resin pour, ensuring a smooth and professional finish.

Crafting Designs and Patterns

Resin infusion opens up endless possibilities for infusing creativity into woodworking ventures. Experiment with an array of designs, hues, and patterns by blending pigments or incorporating metallic powders into the resin, creating a personalized palette that transforms each project into a unique work of art. 

The interplay of colours, the fluidity of patterns, and the shimmering effects of metallic powders offer woodworkers a vast playground to explore, encouraging them to push the boundaries of traditional craftsmanship and forge pieces that resonate with individuality and innovation.

Whether aiming for a sleek modern aesthetic or a rustic, nature-inspired finish, the versatility of resin allows artisans to breathe life into their creative visions, making each project a reflection of their distinctive style and the limitless possibilities that resin infusion brings to the world of woodworking.

Incorporating resin into woodworking isn’t just a technique; it’s a journey into a realm of unlimited artistic expression. The fusion of wood and resin creates a symbiotic relationship, resulting in pieces that not only exude beauty but also stand the test of time.

As you embark on this creative journey, remember that experimentation is key. Each project offers an opportunity to refine your skills, discover new possibilities, and push the boundaries of conventional woodworking.

At Build it Gansbaai, we understand the importance of providing enthusiasts like you with the tools and materials needed to bring your visions to life. Our selection of high-quality woodworking supplies, including premium epoxy resins and a variety of wood options, ensures that you have everything you need for your resin-infused projects. 

Whether you’re a seasoned artisan or a novice eager to explore the world of resin-infused woodworking, our dedicated team is here to support your endeavours. As you dive into the world of resin-infused woodworking, share your creations with the community. Social media platforms and online forums are excellent places to connect with fellow artisans, exchange ideas, and showcase your unique projects. 

Your experiences can inspire others to embrace this innovative technique and contribute to the ever-evolving landscape of woodworking.

In conclusion, resin-infused woodworking is more than a trend; it’s a testament to the limitless potential of human creativity. With the right materials, careful planning, and a passion for innovation, you can elevate your woodworking projects to new heights. 

Unleash your imagination, explore the captivating world of resin infusion, and let your creations tell a story of craftsmanship, artistry, and the seamless integration of nature’s elements.

As you embark on your resin-infused woodworking endeavours, remember that Build it Gansbaai is here to be your trusted partner in realizing your creative visions. Happy crafting! 

Pop into your local Build it Gansbaai today, for building materials, do-it-yourself home improvement tools, and expert advice. Or log on to our online store, and shop from the comfort of your home: www.buildit-store.co.za

Follow us on social media, to stay up to date with our latest sizzling specials and promotional offers! Build it Gansbaai/Hermanus offers added value services in respect of hardware retailing; embracing all activity within the building materials industry, focusing specifically on the building of; urban, township, rural housing as well as all home improvements and do it yourself.


Categories
Must Have

Five Power Tools Every Man Needs

Back in the time of the cave man, humans have been using crude tools to make basic objects, such as arrowheads and wheels. However, it wasn’t until the invention of electricity, the arrival of power sources, that we saw a real change in what makes humankind different and the usefulness of power tools.

Hand-held tools are great, but for everything else, there is a power tool available to make every job a lot faster and much easier.

We recommend only purchasing a power tool if you are going to use it on a regular basis, power tools can be expensive and complicated to a degree. Any of the power tools mentioned in this article would be a perfect gift, for a father or the special man in your life.

The Drill

When it comes to carpentry, masonry or metal work, the drill is a toolbox favourite, there are many different types available, but the most popular type seems to the cordless drill.

The drill will be one of the best investments you will make in your power tool collection, just attach the rechargeable battery and you are good to go.

Compared to cordless screwdrivers, cordless drill drivers tend to have higher-voltage batteries and more efficient gear systems. This means that they can deliver greater levels of torque at higher speeds. On average, cordless drill drivers can deliver around 50Nm (Newton metres) of torque.

The Sander

An electric sander is a power tool used to smooth and finish surfaces. The belt sander and the orbit sander are the two basic types, both types come cordless or corded, and are used in woodworking at the end of a job.

Build it Gansbaai Five Power Tools Every Man Needs

The belt sander is the more powerful of the two, capable of doing large areas quickly, while the orbit sander, though small in size, can give any type of wood a beautiful smooth finish. 

You can use an electric sander for a variety of tasks in many industries, including woodworking and auto body repair.

The Saw

Another favourite of carpenters and craftsmen alike, is the saw, there are two distinct types, the reciprocating, and the circular saw. However, the way they are used will be slightly different, even though they are basically designed to cut things.

The reciprocating saw is like a hand saw on steroids, by mimicking the commonly used hand saw, these tools can cut through just about anything and are easier to use than circular saws.

The circular saw is almost strictly used to cut thick pieces of wood in a straight line, circular saws come fixed on a stand, or as handheld devices, therefore doing precise, complicated patterns is not possible.

The Grinder and Oscillator

Although the grinder is a speciality tool, we have added it to our list, as it can be a very useful tool to have. This tool basically replaced the file, in the metal working industry, a grinder can be used to cut or shave down metal.


The oscillator on the other hand is the surgeon’s scalpel of the power tool world, it can go places where the grinder can’t. Not only that, but it can also handle different types of attachments such as sanders, small wood cutters, scraping attachments etc.

A must have for DIY’s, masons, blacksmiths, and carpenters alike, automatically making it one of the most popular power tools out there.

The Chainsaw

The trusty chainsaw, they can be gas powered or electric and there are even cordless electric chainsaws, that are very quiet, and non-polluting.

The chainsaw is one of the most fun power tools to operate, for lumberjacks and anyone who does any type of landscape related work.

They come in all different sizes and powers, the larger ones are used to cut down large trees, and smaller ones for trimming around the garden. 

This monster tool was made famous in movies like, the Texas Chainsaw massacre, anyone who says they wouldn’t like using one is lying.

Might want to start dad with a cordless drill first😊

Most products and materials used in this article are available instore from Build it Gansbaai/Hermanus or on the online store www.buildit-store.com with free local delivery in the Overstrand area, for building materials, do-it-yourself home improvement tools, and expert advice.

Please send us a photo of your completed creation, we would love to see it, you can upload your images in the comments section!

Follow us on social media, to stay up to date with our latest sizzling specials and promotional offers!

Build it Gansbaai/Hermanus offers added value services in respect of hardware retailing; embracing all activity within the building materials industry, focusing specifically on the building of; urban, township, rural housing as well as all home improvements and do it yourself.

Categories
How To

Laying Paving Slabs

Laying paving slabs involves a great deal of physical labour, and in terms of technique, it is much more complicated than tiling a wall. 

Planning, accurate setting out and careful laying, especially during the early stages, will help you achieve your desired results.

Tools Required:

  1. Wooden Pegs
  2. Spirit Level
  3. Club Hammer
  4. Wooden Straight Edge
  5. Garden Roller
  6. Brush

Material Required:

  1. Pavers
  2. Mortar
  3. Gravel
  4. Sand
  5. Hardcore (broken bricks or crushed stone)

Setting Out the Paving Area:

Whenever feasible, plan an area of paving so that it can be laid with whole slabs only. This eliminates the arduous task of cutting units to fit. 

Use pegs and string to mark out the perimeter of the paved area and check the measurements before you excavate. 

You can use a straight wall as a datum line and measure away from it, to allow for a 100mm to 150mm margin of gravel between the wall and paving.

TIP

A gravel margin not only saves time and money by using fewer slabs, but also provides an area for planting climbers and for adequate drainage to keep the wall dry. It is a rule that all paving must be installed 150mm below a damp-proof course, to protect the building.

Marking out an area simply involves accurate measurement, as paving slabs are made to near precise dimensions, and keep an allowance of 6mm to 10mm gaps between the slabs. Some slabs are cast with sloping edges to provide a tapered joint and should be buttered edge to edge.

Preparing A Base for Paving

Paving slabs must be laid upon a firm level base, but the depth and substance of that base depends on the type of soil and the proposed use of the paving. Compact the soil with a garden roller and then spread the sand with a rake and level it by scraping and tamping with a length of timber. 

To support heavier loads, or if the soil is composed of clay or peat, lay a subbase of firmly compacted hardcore (broken bricks or crushed stone) to a depth of 75 to 100mm before spreading the sand to level the surface. If you plan to park vehicles on the paving, increase the depth of hardcore to 150mm.

Laying Paving Slabs

Lay a first-size blob of mortar under each corner and one more to support the center of the slab. 

If you intend to drive vehicles across slabs, lay a continuous bed of mortar about 50mm thick. Lay three slabs at a time, inserting wooden spacers between. 

Level each slab by tapping with a heavy hammer, using a block of wood to protect the surface.  Check the alignment. 

Gauge the slope across the paving by setting up data pegs along the high side. Drive them into the ground until the top of each corresponds to the finished surface of the paving, and then use a straight edge with a packing piece under one end to check the fall on the slabs.

Don’t Walk on the paving for two or three days, until the mortar has set. If you must cross the area lay planks across the slabs to spread the load. 

To fill the gaps between paving slabs, brush a dry mortar mix into the open joints. Remove any surplus material from the surface of the paving, then sprinkle the area with a very fine spray of water to consolidate the mortar. 

Please Note: Avoid dry mortaring if heavy rain is imminent, it may wash the mortar out.

Did You Know?

What is the difference between Mortar Mix and Concrete Mix?

The terms cement, concrete, and mortar are often used interchangeably, but they are different materials with different uses. Though both mortar and concrete are widely used building materials, they cannot be substituted for each other without compromising the integrity of a build.

Mortars with a high water-cement ratio bond best. 

This is the opposite of concrete, where concrete mix is formulated for strength and lower water content makes it stronger and more effective for its purpose. 

Additives or plasticizers may be added to mortar mixes to increase their flexibility.

All the Tools and Materials required for Laying Paving Slabs are available for purchase and delivery from the Build it Online Store www.buildit-store.com

Please send us a photo of your completed project, we would love to see it, you can upload your images in the comments section!

Remember to plan your next DIY project with Build it Gansbaai, get the job done right, first time.

Follow us on social media, to stay up to date with our latest sizzling specials and promotional offers!

Shop online www.buildit-store.co.za or visit us instore at Build it Gansbaai, your local building materials partner, helping you make home building simple! 

Build it Online store offers Free local delivery, supplying the Overstrand area with building materials, do-it-yourself home improvement tools, and expert advice.

Build it Gansbaai offers added value services in respect of hardware retailing; embracing all activity within the building materials industry, focusing specifically on the building of; urban, township, rural housing as well as all home improvements and do it yourself.

Categories
Do It Yourself

How to Build an Easy DIY Desk for Children.

We will show you step by step how to build a wall mounted desk for your child in less than a day.

Step 1

With this easy to follow project, we will have you feeling like a DIY professional in no time!

To get started, simply choose an empty wall in your child’s room where they will be doing their homework and follow these easy steps.

Below you will find a list of tools and materials required to complete this project. 

Tools Required

  1. Carpenter’s pencil
  2. Clean cloths
  3. Electric sander
  4. Level
  5. Paint brush
  6. Power drill
  7. Protective gloves
  8. Tape measure

Materials Required

  1. 180-grit sandpaper
  2. 19-1/2-in. metal shelf brackets (2)
  3. 60cm x 1 Meter pre-cut wood board (1)
  4. 5cm wood screws (6)
  5. 5/8-in. wood screws (6)
  6. 80-grit sandpaper
  7. Wood conditioner
  8. Wood stain

Step 2

Mark the Desk Height

The desk hight should be about 65cm for a young child but keep in mind that children grow so we have set the desk hight at 75cm.

Measure the height of the desk against the wall and mark the spot with a pencil.

You will need about 25cm between the top of the chair and the bottom of the desk for comfort.

Step 3

Attach Brackets

Use a level to make sure that your brackets are straight, then hold the bracket in place to secure.

Using your power drill and 5cm wood screws, attach the bracket to the wall.

So easy! 

Now let’s do the second bracket!

Step 4

Sanding the Desktop 

The objective of sanding wood is to remove mill marks, and other flaws that could have been introduced at the factory or in handling.

Sanding makes the surface of the wood smooth, improving the appearance and bringing out the natural beauty of the wood. 

Prepare your 60cm x 1meter board which is to become the desktop.

Now sand the wood in the direction of the wood grain, which helps camouflage any scratches, with 80-grit sandpaper.  

Then go over the wood again with 180-grit sandpaper;

Wipe the dust away with a dry clean cloth and rub your hand over the wood.

Is the wood perfectly smooth? 

Great! Let’s continue.

Step 5

Conditioning the Desktop

The reason we treat the surface of the wood with Pre-Stain Wood Conditioner is that it helps prevent streaks and blotches by evening out the absorption of oil-based stains. 

Wood conditioner can be applied on any wood for an even finish but is especially necessary when working with soft or porous woods like pine, alder, birch, and maple.

With your protective gloves on, apply wood conditioner to the Desktop with a clean cloth.

Leave to dry for a few minutes and you can move on to the next step.

Step 6

Staining the Desktop

What is the purpose of wood stain and how does it work?  

Wood stain is a type of paint that is used to colour wood by soaking pigment into wood fibers with a solvent and then having it set and bind to the wood. Stain works by saturating colour into the wood itself, rather than applying a layer of colour over the surface of wood.

Perhaps the most common reason to use stain as protection is against ultraviolet light. Many stains help reflect UV light, which prevents wood surfaces from fading and losing their colour.  

Using a clean cloth, apply the colour of wood stain you have chosen.

Always apply the stain in the direction of the wood grain for an even finish.

Let the stain dry for a few hours then repeat on the other side.

Step 7

Attach the Desktop to the Brackets

And now for our final step!

Once you have placed your board on top of the wall brackets, attach the board from underneath the desk by using 3 of your 8/5-in. wood screws.

Almost done, now let’s do the other side.

Good Job!

The only thing left to do is pull up a chair and decorate!