Categories
How To

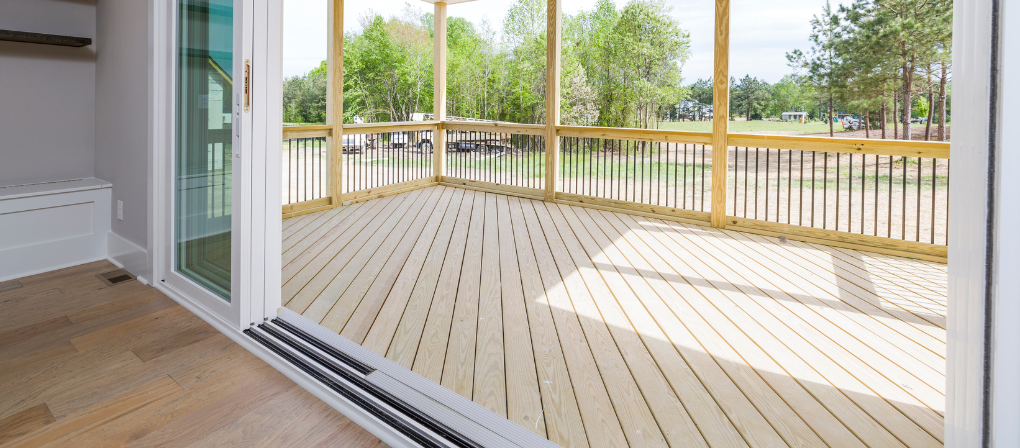
How to Revive Your Outdoor Space with Deck Paint

A well-maintained deck is the perfect outdoor retreat, but over time, weather exposure and heavy use can cause it to fade, splinter, and crack. If your deck has seen better days, applying deck paint is an affordable and effective way to restore it to its former glory. 

With the right tools, materials, and guidance from Build it Gansbaai, you can complete this project over a weekend, leaving your deck looking fresh, durable, and ready for years of enjoyment.

In this guide, we’ll walk you through everything you need to know about choosing and applying deck paint, from preparation to the final coat. 

Whether you’re a DIY enthusiast or tackling your first project, this article will provide step-by-step instructions and answer common queries about restoring your deck.

What Is Deck Paint?

Deck paint is a specially formulated coating designed to protect and revitalize wooden decks. 

Unlike regular paint, deck paint is thicker and contains added materials such as acrylic, sand, or aluminium solids that create a durable, textured surface. 

This coating fills in cracks, covers splinters, and forms a water-resistant barrier to shield your deck from moisture and UV damage.

Benefits of Deck Paint:

  • Enhanced Durability: Protects wood from wear, cracking, and fading caused by weather exposure.
  • Safety: Provides a slip-resistant surface, making it safer to walk on, even when wet.
  • Aesthetic Appeal: Revitalizes your deck with a fresh, clean appearance in your chosen colour.
  • Long-Lasting Results: With proper application, high-quality deck paint can last up to 12 years without needing reapplication.

Tools and Materials You’ll Need

To achieve a professional finish with deck paint, you’ll need the following tools and materials:

Tools:
  • Paint tray
  • Paint rollers (one for every 15 litres of paint)
  • Paintbrushes
  • Safety glasses
  • Firm scrubbing brush
  • Roller extension pole
  • High-pressure hose (available for rent if you don’t own one)
Materials:
  • Masking tape
  • Plastic sheeting
  • Acrylic caulk (for filling cracks)
  • Deck cleaner (manufacturer-recommended for compatibility)
  • Deck paint (restoration coating)
  • Paint stirring sticks

Step 1: Choosing the Right Deck Paint

Selecting the best deck paint for your project is the foundation of success. At Build it Gansbaai, we highly recommend Woodoc Water-Borne Deck for its superior performance and durability.

Why Woodoc Water-Borne Deck Paint?

  • Developed in South Africa with advanced international technology.
  • High UV protection to withstand the harsh African sun.
  • Designed specifically for wooden decks and staircases, offering long-lasting beauty and protection.

If Woodoc isn’t your preferred choice, our knowledgeable staff at Build it Gansbaai can help you find alternative options that suit your needs and budget. 

Be sure to select a colour that complements your home while considering practical factors. 

For example, darker colours may absorb more heat, making the deck uncomfortably warm on sunny days.

Step 2: Preparing the Surface

Proper preparation is key to ensuring that your deck paint adheres effectively and lasts for years. Follow these steps:

1. Protect the Surrounding Area

  • Cover nearby posts, rails, and walls with plastic sheeting and secure it with masking tape.
  • Spread plastic sheeting or drop cloths under the deck to catch drips and minimize cleanup.

2. Inspect and Repair the Deck

  • Reset protruding nails and secure any loose boards with deck screws.
  • Use 80-grit sandpaper to sand the entire deck, removing old paint or finishes and roughing up the surface for better adhesion.

3. Clean the Deck Thoroughly

  • Dilute the deck cleaning product according to the manufacturer’s instructions.
  • Apply the cleaner and let it soak in for the recommended time.
  • Use a firm scrubbing brush to remove grease, dirt, and grime.
  • Finish by using a high-pressure hose to rinse away debris, paying special attention to gaps between boards.

4. Allow the Deck to Dry

After cleaning, let the deck dry completely for about a week to ensure the wood is moisture-free before applying deck paint.

Step 3: Applying Deck Paint

With the preparation complete, it’s time to transform your deck with deck paint. This process can be completed over a weekend.

Day 1: Apply the First Coat
  1. Fill Cracks and Holes: Use acrylic caulk to fill any visible gaps or imperfections. Allow it to set before painting.
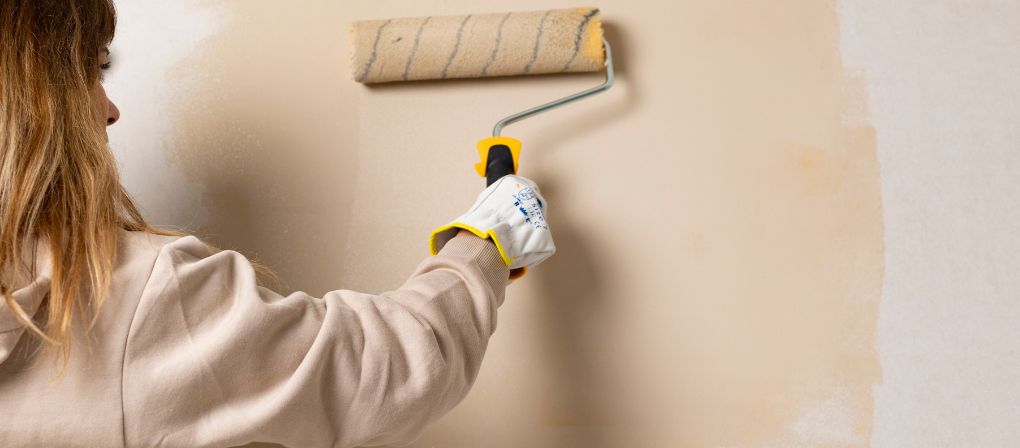
  2. Roll on the First Coat: Dip the roller in the paint tray and press it down firmly onto the boards. Apply a thick, even coat, covering several boards at a time.
  3. Drying Time: Allow the first coat to dry for at least six hours or until it’s dry to the touch.

Note: The first coat acts as a primer, ensuring that all restored areas are sealed and ready for the final finish.

Day 2: Apply the Second Coat
  1. Apply the Final Coat: Repeat the same method used for the first coat. Take your time to ensure an even and thorough application.
  2. Drying Time: Let the second coat cure for at least two days before using the deck. This extended drying time ensures that the coating fully bonds to the wood.

Tips for a Successful Deck Restoration

  • Weather Considerations: Choose a dry, warm weekend for your project. Avoid painting when rain is imminent or during extremely hot hours when the deck’s surface may exceed 50°C.
  • Manufacturer’s Instructions: Always read and follow the manufacturer’s guidelines for both cleaning and painting products.
  • Maintenance: To keep your deck looking its best, clean it regularly with the manufacturer’s recommended deck cleaner and reapply a maintenance coat as needed.

Why Choose Build it Gansbaai for Your Deck Paint Needs?

At Build it Gansbaai, we’re committed to providing the highest quality deck paint and restoration products. 

Our friendly team is always on hand to offer expert advice, ensuring you choose the perfect solution for your deck. 

Whether it’s finding the right colour or selecting tools and materials, we have everything you need under one roof.

Revive Your Deck with Deck Paint

Using high-quality deck paint is the most cost-effective way to rejuvenate your outdoor space, providing a durable and visually appealing finish. 

By carefully preparing your deck and following proper application techniques, you can extend its lifespan and protect it from the elements for years to come. 

Build it Gansbaai offers top-notch deck paint, tools, and guidance to make your project a success.

Visit Build it Gansbaai today to explore our range of deck paint options and start your journey toward a beautifully restored deck. 

Our knowledgeable team is here to help every step of the way.

Please follow us on social media to stay up to date with our latest sizzling specials and promotional offers! 

Build it Gansbaai offers added value services in respect of hardware retailing; embracing all activity within the building materials industry, focusing specifically on the building of; urban, township, rural housing as well as all home improvements and do it yourself.

Build it is a division of the SPAR Group Limited South Africa. A voluntary trading group of individually owned retail stores with more than 10 000 employees across the group, we currently have stores in South Africa, Namibia, Swaziland, Lesotho and Mozambique with plans to expand into Botswana and Zambia in the near future. We view ourselves not only as a supplier of materials, but as a partner to our valued customers in accomplishing their building or renovating projects.
Categories
How To

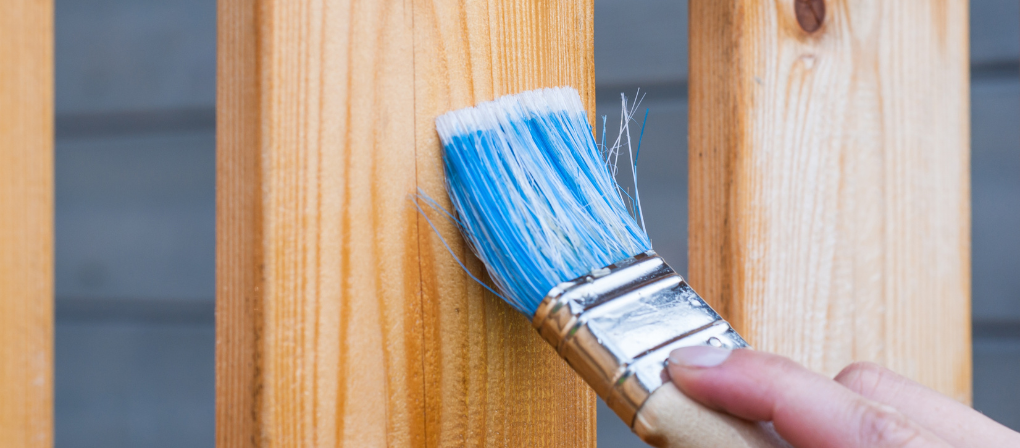
How to Achieve a Flawless Finish with Wood Paint.

Painting wood is a rewarding DIY project that can transform furniture, cabinets, or trim into beautiful and durable features. However, achieving smooth, professional results requires the right preparation, tools, and techniques. 

At Build it Gansbaai, we know how important it is to get the job done right, which is why we’ve put together this detailed guide to help you master the art of using wood paint.

Whether you’re tackling a home improvement project or refreshing old furniture, this guide covers everything you need to know to achieve a flawless finish.

What is Wood Paint and Why Does It Matter?

Wood paint is specifically designed to adhere to wooden surfaces while providing a smooth and long-lasting finish smooth and long-lasting finish

Unlike general-purpose paints, wood paint contains properties that allow it to withstand wear and tear, resist moisture, and enhance the natural beauty of wood.

Why Use Wood Paint?

  • Durability: Protects wood from scratches, stains, and damage.
  • Aesthetic Appeal: Adds colour, shine, or a textured finish for a refined look.
  • Versatility: Suitable for furniture, trim, cabinets, and more.
  • Protection: Prevents moisture penetration, which can lead to warping or decay.

Tools and Materials You’ll Need for Painting Wood

To achieve a smooth and even finish with wood paint, it’s essential to have the right tools and materials on hand. Here’s a checklist to help you get started:

Equipment/Tools:

  • Plastic drop sheeting
  • Rubber gloves
  • Bucket
  • Clean cloths
  • Random orbital sander or sandpaper
  • Vacuum
  • 70mm paintbrush
  • High-density foam roller
  • Paint tray

Materials:

  • TSP (tri-sodium phosphate) or a similar cleaner
  • 180-grit and 220-grit sandpaper
  • Tack cloth
  • Primer
  • Enamel or interior acrylic-latex wood paint
  • Paint additives like Penetrol or Floetrol (optional)

Step-by-Step Guide to Painting Wood

To achieve the best results with wood paint, follow these simple steps. Proper preparation and patience are key to creating a professional-quality finish.

Step 1: Prepare the Workspace and Clean the Wood

Protect Your Work Area
  • Cover your floors, workbench, or other surfaces with plastic drop sheeting to catch spills and drips.
  • Ensure proper ventilation, especially if you’re using oil-based paints or strong cleaners.
Clean the Wood
  • Mix a solution of TSP with warm water according to the product instructions.
  • Dampen a clean cloth with the solution, wring it out, and wipe down the wood to remove dirt, grease, and oils.
  • Let the wood dry completely.

Pro Tip: TSP is an excellent degreaser, but if it’s unavailable, you can use a similar surface cleaner.

Step 2: Sand and Prime the Wood

Sand the Wood
  • Start with 120-grit sandpaper to smooth the bare wood surface. This step creates a slightly rough texture that helps the primer adhere better.
  • After priming, use 220-grit sandpaper for a finer, smoother finish.
Apply Primer
  • Use a primer specifically formulated for wood surfaces. Apply a thin, even coat using a brush or roller.
  • If the primer appears streaky or uneven, apply a second coat once the first layer is dry.
Smooth the Primer
  • Once the primer is dry, sand it lightly with 220-grit sandpaper for a super-smooth base.
  • Vacuum the surface to remove dust, then use a tack cloth to pick up any remaining particles.

Step 3: Choose the Right Wood Paint

Selecting the right wood paint is essential for a successful project. At Build it Gansbaai, we recommend high-quality enamel paint for its durability and smooth finish

Enamel paint dries harder than regular paint, making it ideal for cabinets, furniture, and trim.

Additives to Consider:
  • Penetrol: Improves the flow of oil-based paints, reducing brush marks and increasing adhesion.
  • Floetrol: Enhances the levelling and flow of water-based paints, giving you a smoother finish.

These additives slow down the drying process, making it easier to achieve a flawless coat.

Step 4: Apply the Wood Paint

Roll the Paint On
  • Use a high-density foam roller to apply the first coat of wood paint. Foam rollers are excellent for creating a smooth, streak-free finish, especially on flat surfaces.
  • Work in small sections, keeping a wet edge to avoid lap marks.
Use a Paintbrush for Details
  • For crevices, edges, and corners, use a quality paintbrush to fill in areas the roller can’t reach.
Let It Dry
  • Allow the first coat to dry completely (refer to the paint manufacturer’s instructions). This step is critical to achieving durability and a smooth finish.

Step 5: Apply Additional Coats

Inspect the First Coat
  • Check for imperfections, such as streaks or thin areas. Sand lightly if necessary.
  • Remove dust with a tack cloth before applying the next coat.
Apply the Second Coat
  • Repeat the process with the foam roller and brush, ensuring even coverage.
  • Allow the final coat to dry overnight for the best results.

Pro Tip: Avoid applying a second coat while the first is still tacky, as this can cause tearing or unevenness.

Tips for Perfect Results

Here are some extra tips to ensure success with wood paint:

  • Work in Optimal Conditions: Avoid painting in humid or very cold conditions, as this can affect drying time and finish quality.
  • Don’t Rush: Take your time to prep, paint, and dry each layer for a professional-looking result.
  • Practice Makes Perfect: If you’re new to painting, practice on a scrap piece of wood before starting your main project.

Why Choose Build it Gansbaai for Your Wood Paint Needs?

At Build it Gansbaai, we offer a wide range of high-quality wood paint, primers, and painting tools to help you achieve the best results. 

Our knowledgeable staff is here to answer your questions and recommend the right products for your project.

What We Offer:

  • Top Brands: Choose from trusted manufacturers for long-lasting results.
  • Expert Advice: Our experienced team can guide you through every step of your project.
  • Local Delivery: We supply the greater Overberg area with everything you need for home improvement.

Transform Your Wooden Surfaces with the Right Paint

Using wood paint is an affordable and effective way to refresh your furniture, cabinets, or trim. 

By following these steps and choosing the best products, you can achieve a smooth, durable finish that enhances the beauty of your home. 

Whether you’re a seasoned DIYer or a first-time painter, Build it Gansbaai is your trusted partner for quality supplies and expert advice.

Visit Build it Gansbaai today to explore our range of wood paint, tools, and materials. Our friendly team is ready to help you bring your vision to life!

Please follow us on social media to stay up to date with our latest sizzling specials and promotional offers! 

Build it Gansbaai offers added value services in respect of hardware retailing; embracing all activity within the building materials industry, focusing specifically on the building of; urban, township, rural housing as well as all home improvements and do it yourself.

Build it is a division of the SPAR Group Limited South Africa. A voluntary trading group of individually owned retail stores with more than 10 000 employees across the group, we currently have stores in South Africa, Namibia, Swaziland, Lesotho and Mozambique with plans to expand into Botswana and Zambia in the near future. We view ourselves not only as a supplier of materials, but as a partner to our valued customers in accomplishing their building or renovating projects.
Categories
How To

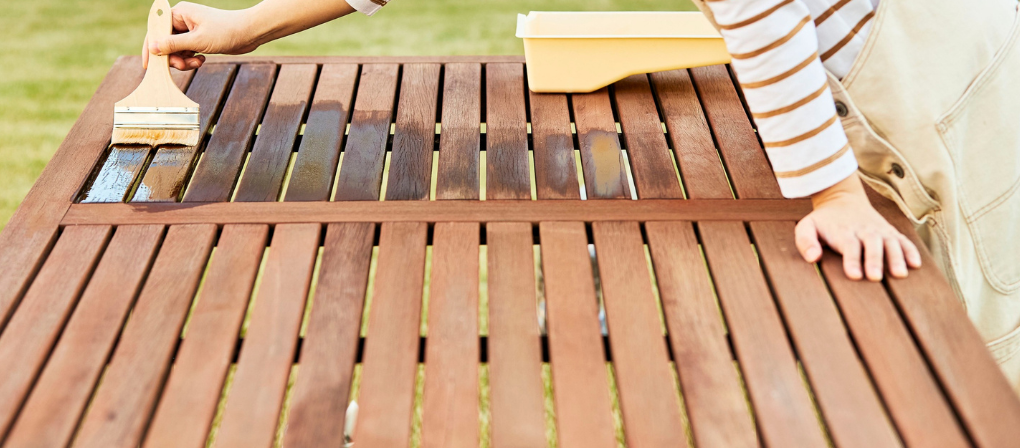
Preserving the Beauty of Your Wooden Assets with Winter Woodcare.

As South Africa embraces the winter season, it becomes imperative to prioritize the care and maintenance of our cherished wooden assets. Woodcare isn’t merely about preserving the innate allure of wood; it’s also about shielding it from the unforgiving elements. 

In this comprehensive guide, we’ll delve into the significance of woodcare in South Africa, especially during the winter months. We’ll explore a variety of woodcare products, offering insights into their application and frequency to ensure your wooden treasures remain resilient and captivating all year round.

Protecting Against Moisture and Humidity:

South Africa’s winter season often brings elevated levels of moisture and humidity, posing substantial challenges to wooden surfaces. 

Effective woodcare entails establishing a protective barrier that prevents water absorption, warping, and decay. 

Applying a premium-quality wood sealant or varnish creates a shield against moisture, safeguarding your wooden assets from the perils of winter weather.

Preserving Natural Beauty:

Wood is celebrated for its innate warmth and aesthetic appeal. Regular woodcare maintenance serves to uphold its original charm, even amidst seasonal transitions. 

In a country like South Africa, where wooden furniture, decking, and structures abound, utilizing appropriate woodcare products enhances their visual allure and ensures longevity.

Choosing the Right Woodcare Products:

South Africa boasts a diverse array of woodcare products tailored to various needs. From penetrating oils to protective stains and finishes, each product serves a specific purpose. 

Selecting the right woodcare product hinges on factors such as exposure, location, and desired finish. 

Seek guidance from experts at your local hardware store to identify the ideal woodcare products for your unique requirements.

Frequency of Woodcare Applications:

The frequency of woodcare applications varies based on factors like wood type, exposure level, and the specific product used. Generally, it’s advisable to apply a fresh coat of woodcare product annually or as needed. 

However, high-traffic areas or wooden assets exposed to severe weather conditions may necessitate more frequent maintenance. Regularly inspect your wooden assets to discern signs of wear or fading, indicating the need for reapplication.

Comprehensive Woodcare Routine:

While winter warrants heightened woodcare attention, adopting a comprehensive woodcare routine year-round is essential. 

Regular cleaning, dusting, and inspection of wooden assets facilitate early detection of issues. Promptly address scratches, stains, or damages using suitable woodcare products to prevent further deterioration.

Early Signs for New Varnish or Woodcare:

Detecting the need for new varnish or woodcare involves observing early signs of wear and damage. 

Here are some key indicators to consider:

Fading or Discoloration:

Fading or discoloration of wooden surfaces is often a result of prolonged exposure to sunlight, moisture, or air pollutants. Over time, UV rays from the sun can break down the natural pigments present in wood, causing it to lose its original colour and vibrancy. 

Discoloration may also occur due to water damage, mould, mildew, or chemical reactions. When wood appears faded, patchy, or uneven in colour, it indicates that the protective coating has worn off, leaving the surface vulnerable to further damage.

Dry or Rough Texture:

A dry or rough texture in wood is a clear sign of moisture loss and degradation of the protective layer. Wood naturally contains moisture, which helps maintain its flexibility and smoothness. 

However, when the protective coating wears off or becomes compromised, moisture can escape from the wood, leading to a dry, rough, or parched texture. 

This can make the wood feel coarse to the touch and detract from its natural beauty.

Water Absorption:

Wood that readily absorbs water instead of repelling it suggests a lack of adequate protection. When a protective coating, such as varnish or sealant, breaks down or wears off, the wood’s ability to resist water penetration diminishes. 

As a result, the wood absorbs water like a sponge, which can lead to swelling, warping, and structural damage over time. Conducting a simple water absorption test by placing a few drops of water on the wood surface can help determine its protective status.

Increased Porosity:

Porosity refers to the extent to which wood can absorb liquids and moisture. As wood ages or undergoes wear and tear, its pores may become enlarged, making it more porous. Increased porosity indicates a loss of the protective layer, leaving the wood vulnerable to moisture intrusion, staining, and decay. 

Wood with high porosity tends to absorb finishes unevenly and may require more frequent recoating to maintain its integrity.

Cracks, Splintering, or Warping:

Cracks, splintering, or warping in wood are visible signs of structural deterioration and moisture damage. When wood loses its moisture content due to inadequate protection, it can shrink, crack, or split along the grain. 

Additionally, exposure to fluctuating humidity levels can cause wood to warp or bend out of shape. These issues not only compromise the aesthetics of wood but also weaken its structural integrity, posing safety risks and reducing its lifespan.

Lack of Shine or Lustre:

The loss of shine or lustre on wood surfaces is indicative of a worn or deteriorated protective coating. 

Varnishes and sealants are designed to enhance the natural beauty of wood by imparting a glossy or satin sheen. However, over time, exposure to environmental factors, abrasion, and chemical degradation can cause these coatings to lose their shine and become dull or matte. 

Lack of shine not only diminishes the visual appeal of wood but also exposes it to potential damage from moisture, UV rays, and physical abrasion.

Increased Vulnerability to Stains and Spills:

When wood becomes more susceptible to stains and spills, it suggests a compromised protective barrier. A healthy protective coating helps repel liquids and prevent them from penetrating the wood surface. 

However, if the protective layer wears off or deteriorates, liquids can seep into the wood, leaving behind unsightly stains and discoloration. 

Increased vulnerability to stains and spills not only detracts from the appearance of wood but also makes it more challenging to clean and maintain. By paying attention to these key indicators, you can assess the condition of your wood and determine whether it requires new varnish or woodcare treatment to preserve its beauty and integrity. 

Regular inspection and maintenance are essential for prolonging the lifespan of wooden assets and ensuring their continued enjoyment for years to come.

Our experienced team is here to assist you in selecting the right supplies and tools for your projects. Contact us today for expert advice and reliable products! Don’t forget to follow us on social media to stay updated on our latest specials and offers! 

Build it Gansbaai is your trusted partner for all your building material requirements. Learn more about Build it Gansbaai here or contact us today for a quote.

Build it Gansbaai offers added value services in respect of hardware retailing; embracing all activity within the building materials industry, focusing specifically on the building of; urban, township, rural housing as well as all home improvements and do it yourself.

Categories
How To

Discover Duram Paint: A Comprehensive Guide to Choosing the Right Interior Paint for Your Home by Build it Gansbaai.

Selecting the right durable interior paint for your home interior is crucial for achieving the desired aesthetic appeal and ensuring durability. With various types of paint available, each suited for specific rooms and surfaces, it’s essential to make an informed decision. 

In this guide, we’ll explore the best types of paint for different areas of your home, focusing on quality products from Duram Paint, available at Build it Gansbaai.

Introducing Duram Paint

Duram is a leading South African manufacturer renowned for producing high-quality paints designed to withstand the country’s toughest climates. 

With over 40 years of experience, Duram offers a diverse range of interior and exterior decorative paints, providing luxurious finishes in every colour to suit your style and preferences.

Key Features of Duram Paint:

Durability: 

Engineered to withstand wear and tear, Duram paints offer superior durability, making them ideal for high-traffic areas.

South African: 

Developed to protect against South Africa’s diverse climate conditions, Duram paints are trusted by homeowners nationwide.

Versatility: 

From smooth matt finishes to high gloss, Duram paints cater to various preferences, ensuring elegance in every space.

Choosing the Right Paint for Different Rooms

1. Bedrooms

Recommended Paint: Duram Classic Matt

Key Features:
  • Superior durability for high-wear areas.
  • Luxurious matt finish that diffuses light and covers imperfections.
  • Quick-drying and washable, ideal for busy households.

2. Living Rooms

Recommended Paint: Duram Satin Touch

Key Features:
  • Elegant satin finish for beautiful living spaces.
  • Fully washable with enhanced scrub and stain resistance.
  • Water-based for easy cleanup and rapid room re-entry.

3. Bathrooms & Kitchens

Recommended Paint: Duram Bathroom and Kitchen Low-Sheen

Key Features:
  • Durable low-sheen finish suitable for high-condensation areas.
  • Formulated with silver ion technology for hygienic surfaces.
  • Fully washable and quick drying for convenient application.

4. Trims, Doors, Windows, and Skirtings

Recommended Paint: Duram Enamel & Trim

Key Features:
  • Premium semi-gloss enamel for hardwearing surfaces.
  • Scratch, stain, and UV resistant for long-lasting protection.
  • Water-based and quick-drying for easy application and cleanup.

Tips for Choosing the Right Paint

Consider Room Conditions: 

Assess factors such as lighting, moisture levels, and activities when selecting paint for each room.

Opt for Durability: 

Choose paints designed for high-traffic areas and frequent cleaning to ensure longevity.

Utilize Professional Colour Tinting: 

Take advantage of Duram’s colour tinting services to customize your paint colours according to your preferences. Selecting the best paint for your home interior requires careful consideration of room conditions, surface types, and durability requirements. 

With Duram Paint’s extensive range of high-quality products available at Build it Gansbaai, you can achieve both aesthetic elegance and long-term protection for your living spaces. 

Whether you’re painting a bedroom, living room, kitchen, or bathroom, Duram paints offer superior performance and luxurious finishes to enhance every corner of your home. 

Visit our store or explore our online shop to discover the perfect paint for your next home improvement project. Experience the beauty and durability of Duram Paint – where quality meets craftsmanship.

Follow us on social media, to stay up to date with our latest sizzling specials and promotional offers!

Build it Gansbaai offers added value services in respect of hardware retailing; embracing all activity within the building materials industry, focusing specifically on the building of; urban, township, rural housing as well as all home improvements and do it yourself.

Build it is a division of the SPAR Group Limited South Africa.  A voluntary trading group of individually owned retail stores with more than 10 000 employees across the group, we currently have stores in South Africa, Namibia, Swaziland, Lesotho and Mozambique with plans to expand into Botswana and Zambia in the near future. We view ourselves not only as a supplier of materials, but as a partner to our valued customers in accomplishing their building or renovating projects.
 

Categories
How To

Mastering the Art of Resin-Infused Woodworking: A Comprehensive Guide

For woodworking enthusiasts seeking to push the boundaries of their craft, the integration of resin has emerged as a transformative technique, adding a unique blend of aesthetics, durability, and versatility to wooden creations. 

In this extensive guide, we will explore the remarkable potential of incorporating resin into woodworking, providing valuable insights and detailed tips to assist you in creating truly remarkable resin-infused masterpieces.

Understanding Resin and Its Characteristics

Resin, whether synthetic or natural, stands as a versatile material that can be poured, moulded, or shaped to produce diverse finishes and effects.  Epoxy resin, in particular, is widely favoured in woodworking for its robustness, transparency, and strong adhesion to wood, making it an ideal choice for creating stunning, long-lasting projects.

Selecting the Appropriate Resin

The success of any woodworking project with resin hinges on the careful selection of the right resin. Opt for epoxy resin specifically formulated for woodworking applications, ensuring optimal bonding strength and longevity. Consider crucial factors such as curing time, clarity, and UV resistance to make an informed choice that aligns with the unique requirements of your project.

Prepping the Wooden Surface

Achieving a flawless resin finish begins with proper preparation of the wooden surface. Thoroughly sand the wood to create an even surface, eliminating any dust or debris that could compromise the final result. 

The application of a sealant or primer is essential to prevent the formation of air bubbles during the resin pour, ensuring a smooth and professional finish.

Crafting Designs and Patterns

Resin infusion opens up endless possibilities for infusing creativity into woodworking ventures. Experiment with an array of designs, hues, and patterns by blending pigments or incorporating metallic powders into the resin, creating a personalized palette that transforms each project into a unique work of art. 

The interplay of colours, the fluidity of patterns, and the shimmering effects of metallic powders offer woodworkers a vast playground to explore, encouraging them to push the boundaries of traditional craftsmanship and forge pieces that resonate with individuality and innovation.

Whether aiming for a sleek modern aesthetic or a rustic, nature-inspired finish, the versatility of resin allows artisans to breathe life into their creative visions, making each project a reflection of their distinctive style and the limitless possibilities that resin infusion brings to the world of woodworking.

Incorporating resin into woodworking isn’t just a technique; it’s a journey into a realm of unlimited artistic expression. The fusion of wood and resin creates a symbiotic relationship, resulting in pieces that not only exude beauty but also stand the test of time.

As you embark on this creative journey, remember that experimentation is key. Each project offers an opportunity to refine your skills, discover new possibilities, and push the boundaries of conventional woodworking.

At Build it Gansbaai, we understand the importance of providing enthusiasts like you with the tools and materials needed to bring your visions to life. Our selection of high-quality woodworking supplies, including premium epoxy resins and a variety of wood options, ensures that you have everything you need for your resin-infused projects. 

Whether you’re a seasoned artisan or a novice eager to explore the world of resin-infused woodworking, our dedicated team is here to support your endeavours. As you dive into the world of resin-infused woodworking, share your creations with the community. Social media platforms and online forums are excellent places to connect with fellow artisans, exchange ideas, and showcase your unique projects. 

Your experiences can inspire others to embrace this innovative technique and contribute to the ever-evolving landscape of woodworking.

In conclusion, resin-infused woodworking is more than a trend; it’s a testament to the limitless potential of human creativity. With the right materials, careful planning, and a passion for innovation, you can elevate your woodworking projects to new heights. 

Unleash your imagination, explore the captivating world of resin infusion, and let your creations tell a story of craftsmanship, artistry, and the seamless integration of nature’s elements.

As you embark on your resin-infused woodworking endeavours, remember that Build it Gansbaai is here to be your trusted partner in realizing your creative visions. Happy crafting! 

Pop into your local Build it Gansbaai today, for building materials, do-it-yourself home improvement tools, and expert advice. Or log on to our online store, and shop from the comfort of your home: www.buildit-store.co.za

Follow us on social media, to stay up to date with our latest sizzling specials and promotional offers! Build it Gansbaai/Hermanus offers added value services in respect of hardware retailing; embracing all activity within the building materials industry, focusing specifically on the building of; urban, township, rural housing as well as all home improvements and do it yourself.


Categories
How To

Swing into Fun, How to Build a Wooden Rope Garden Swing for Kids!

Get ready to bring endless joy and excitement to your backyard with a charming DIY project that’s perfect for kids—a wooden rope garden swing! 

In this step-by-step guide, we’ll show you how to create a swing that will have your little ones soaring through the air while creating unforgettable memories. So, grab your tools, unleash your inner DIY hero, and let’s get swinging!

Materials Needed:

2 sturdy wooden planks (8 feet long, 2 inches thick)

  • Rope (strong and weather-resistant)
  • Drill
  • Wood screws
  • Saw
  • Sandpaper
  • Measuring tape
  • Pencil
  • Safety goggles (to protect those peepers!)

Creative imagination (because swings are all about fun!)

Step 1: Measure and Cut the Wooden Planks

To start off, measure and mark the desired length for the seat of your swing on the wooden planks. We recommend a length of around 3 feet. 

Use your trusty saw to make clean, even cuts along the marked lines. Smooth out any rough edges with sandpaper to ensure a splinter-free swinging experience.

Step 2: Drill the Rope Holes

Next, it’s time to create the holes for the ropes. Measure approximately 1 inch from each end of the wooden planks and mark the spots. These will be the points where the ropes attach to the swing. 

Put on those safety goggles and use a drill bit that matches the diameter of your rope to drill holes at the marked spots. Be sure to drill straight through the planks to ensure a secure attachment.

Step 3: Thread the Rope

Take your sturdy and weather-resistant rope and cut two equal-length pieces, around 10 feet each (adjust the length based on your desired swing height). Thread one end of each rope through the holes on one wooden plank, making sure they are securely fastened. Tie knots at the ends of the ropes to prevent them from slipping back through the holes.

Step 4: Hang the Swing

Now comes the fun part—hanging the swing! Find a sturdy and safe spot in your garden or backyard to anchor the swing. It could be a sturdy tree branch, a sturdy frame, or even a dedicated swing set. 

Make sure the structure you choose is capable of supporting the weight of the swing and the little adventurers who will be using it.

Step 5: Attach the Other End of the Rope

Once you’ve found the perfect spot, thread the free ends of the ropes through the holes on the other wooden plank. Adjust the height of the swing by tying knots at the desired length. Make sure the knots are secure and won’t come undone during playtime.

Step 6: Safety First!

Before you let the kids hop on the swing, double-check that everything is safe and secure. Give the swing a gentle push to ensure it can handle the weight and movement without any issues. Inspect the ropes, knots, and wooden planks to ensure they are in good condition.

Step 7: Let the Swinging Begin!

It’s time to let the little ones unleash their energy and swing to their heart’s content! Encourage them to have fun, reach for the sky, and enjoy the thrill of flying through the air. Remember, adult supervision is always important during playtime.

Congratulations, you’ve successfully built a wooden rope garden swing that will provide endless entertainment for your kids! 

With just a few simple materials and a dash of DIY enthusiasm, you’ve created a fantastic addition to your backyard that will bring smiles and laughter for years to come. So go ahead, sit back, and watch as your children create cherished memories swinging into fun!

Please send us a photo of your completed project, we would love to see it, you can upload your images in the comments section!

All the tools and materials used in this article are available instore from Build it Gansbaai, for building materials, do-it-yourself home improvement tools, and expert advice. Or log on to our online store and shop from the comfort of your home: www.buildit-store.co.za

Build it Hermanus offers added value services in respect of hardware retailing; embracing all activity within the building materials industry, focusing specifically on the building of; urban, township, rural housing as well as all home improvements and do it yourself.

Categories
How To

How to Build a Charming Indoor General-Purpose Table Out of Pine Wood Step by Step

Building a charming indoor general-purpose table out of Pine Wood can be a great DIY project for those who enjoy woodworking, as it not only allows you to flex your creative muscles, but also provides a functional and practical addition to your home decor, whether it’s for working, dining, or socializing.

Today we will be Building a 2-meter wide, 4-meter long, and 1-meter-high table made of pine wood. To begin, you’ll need to gather all the necessary tools and materials. By following these steps, you can create a beautiful and functional table that will add warmth and character to any room in your home.

Materials:

  • 6 pine wood boards (2m x 0.2m x 0.02m)
  • 4 pine wood boards (4m x 0.2m x 0.02m)
  • 4 pine wood boards (2m x 0.2m x 0.02m)
  • 4 wooden legs (1m x 0.1m x 0.1m)
  • Screws
  • Wood glue
  • Sandpaper
  • Stain or paint (optional)

Tools:

  • Measuring tape
  • Circular saw or handsaw
  • Drill
  • Screwdriver
  • Clamps
  • Sanding block or electric sander
  • Paintbrush (if using stain or paint)

Step 1: Cut the Boards

Using a measuring tape, mark and cut the six 2-meter boards into 4 equal lengths of 0.5 meters each. These will be used as the table’s tabletop planks. 

Then, cut the four 4-meter boards in half to make eight 2-meter-long pieces. These will be used to create the table’s frame. Lastly, cut the four wooden legs to 1 meter in length.

Step 2: Create the Tabletop

Lay the four tabletop planks side by side on a flat surface. Use wood glue to attach them together. Clamp the planks tightly and leave to dry for several hours.

Step 3: Create the Table Frame

Place the four 2-meter-long pieces of wood in a rectangular shape. Attach the corners with screws and wood glue. To make the joints stronger, drill pilot holes before attaching the screws. 

Use the measuring tape to ensure that the rectangle’s dimensions are 2 meters wide by 4 meters long.

Step 4: Attach the Tabletop to the Frame

Place the tabletop on top of the table frame. Use screws and wood glue to attach the tabletop to the frame. Again, drill pilot holes to make the joints stronger.

Step 5: Attach the Legs

Flip the table over and attach the legs to the corners of the frame. Use screws and wood glue to secure them in place. Again, drill pilot holes to make the joints stronger.

Step 6: Sand and Finish the Table

Use sandpaper or an electric sander to smooth out any rough edges and surfaces. Finish the table with a coat of stain or paint, if desired. Allow the stain or paint to dry completely before using the table.

Good Job! Your, 2-meter wide, 4-meter long, and 1-meter-high pine wood table is now complete!

The process of building a pine wood table from scratch involves various steps, from selecting and preparing the wood, to cutting and joining the pieces, to sanding and finishing the surface, all of which require patience, precision, and attention to detail, but can be rewarding and fulfilling for those who appreciate the beauty and value of handmade furniture.

All the tools and materials used in this article are available instore from Build it Gansbaai, for building materials, do-it-yourself home improvement tools, and expert advice.

Please send us a photo of your completed creation, we would love to see it, you can upload your images in the comments section! Follow us on social media, to stay up to date with our latest sizzling specials and promotional offers!

Build it Gansbaai offers added value services in respect of hardware retailing; embracing all activity within the building materials industry, focusing specifically on the building of; urban, township, rural housing as well as all home improvements and do it yourself.

Categories
How To

How To Paint Your Kitchen

This is a great easy project to take on over a weekend, as it will not take longer than 2 days to complete, assuming your kitchen is about 10 square meters.

Let’s face it, we would all love to have a full kitchen remodel, but this could be a bit on the expensive side and not fit your budget at all.

Financially it would be simpler to consider a more cost-effective alternative, like painting the kitchen, you will be surprised how a simple coat of paint can freshen things up again. As most of your kitchen’s wall space is consumed by wall cabinets, sinks, and backsplashes, you have far less square footage to deal with, than if you were painting your lounge or dining room.

The smaller paintable areas will usually need extensive cleaning and preparation work, but products like degreasing cleaners and a good primer will speed things up to help you get the walls into shape for painting.

Tools That You Will Need

1 Paintbrush, 60mm Wide
1 Roller Frame
3 Roller Covers
1 Paint Tray
3 Paint Tray Liners
2 Drop Sheets
1 Dust Mask
4 Microfiber Cloths

Materials Required

10 Liters Interior Acrylic-Latex Paint, Satin or Eggshell
5 Liters Primer
4 Rolls of Masking Tape
1 Roll Painter’s Tape
A Good Cleaning Agent (Powafix Liquid Sugar Soap or Alternative)

Let’s Get Started

Determine the Area You Will Be Painting

Figure out the square footage of your walls so you know how much paint to buy. We have put a materials list together based on the assumption that your kitchen is 10 square meters in size, so you can just adjust the amounts accordingly. Calculate the square footage of each wall by multiplying room height (likely 8 feet/ 2.4 meters) by the room length (variable). Then add up all the walls to get the total.

Great, now let’s start with preparations.

Mask and Cover the Kitchen for Protection

Lay the drop cloth on the floor and drape large objects such as cabinets, appliances, and tables with plastic sheeting and masking tape, then apply the painter’s tape to the trim before painting the walls.

Fun Fact: What is the difference between masking tape and painters’ tape? Painters’ tape has a cleaner removal after the job is done, while masking tape tends to leave residue behind if left up for the duration of a paint project.

Choosing Your Kitchen Paint

Kitchens are the hub of the home for many families so it is important that the room has a warm feeling, and you can do this with the use of colour. A great place to start is by choosing colours that evoke comfort and align with the idea of food and eating.

The best kitchen colours tend to have a high visual impact, satin and semi-gloss tend to be the most popular paint finish for the kitchen, while matte is rarely recommended because it is difficult to clean, and moisture caused by steam will cause streaks.

Preparation

Painting the kitchen begins with completing the first three steps that we have just covered, choosing the right paint, figuring out how much you need, and covering all surfaces to prepare the room.

Clean All Surfaces to Be Painted

Kitchens tend to build up grease in certain areas, so we highly recommend that you thoroughly clean the walls, above and around the stove, oven, and counters with a good degreaser prior to priming.

You can use the microfiber cloths or a vacuum cleaner to remove dust and cobwebs from the tops of baseboards and other trim.

Let’s Start Painting

If the kitchen has already been painted and the paint is still in a good, clean condition, it will most likely not need priming.

Pour a small amount of paint in the tray, soak the roller, then roll the large spaces of the wall in a W-pattern, bringing the roller to about an inch or two of the painter’s tape. Use the roller on the large expanses of wall and the brush for the little strips, between the backsplash and the cabinets.

Let the paint dry for about two hours, then manually paint the areas that the roller could not reach with the paintbrush.

Note: Unpainted drywall, bare wood, and painted surfaces in poor condition should always be primed.

Apply Additional Coats

Let the paint dry for at least a couple of hours, then re-roll and re-brush the next coat, paint colours deepen and reach their full depth when applied in two or three coats.

Wrapping Up

How easy was that? I am sure you are very proud of your efforts; nothing matches the updated sparkle of a low cost kitchen paint job.

Build it Gansbaai How to Paint a Kitchen

There are many other inexpensive ways that could make a huge impact on your kitchen, like lighting and window coverings. A kitchen should be well lit with natural light during the day and have good work lighting for the evening, this creates warmth and ambiance. For a modern look you might consider ditching the old curtains and replacing them with blinds, this will let light in while keeping the option of privacy at night. For your convenience all the products and materials are available from the Build it Gansbaai store, please feel free to ask any of our experienced salespeople for assistance or advice when purchasing a product, we are here to make your shopping experience as memorable as possible.

Build it Gansbaai offers local delivery, supplying the greater Overberg area with building materials, do-it-yourself home improvement tools, and expert advice.

Please follow us on social media to stay up to date with our latest sizzling specials and promotional offers! Or log on to our online store and shop from the comfort of your home: www.buildit-store.co.za

Build it Gansbaai offers added value services in respect of hardware retailing; embracing all activity within the building materials industry, focusing specifically on the building of; urban, township, rural housing as well as all home improvements and do it yourself.

Categories
How To

How To Change a Tap Washer

Not only is a dripping tap annoying, but it also wastes precious water. The Water bylaws make house owners responsible for the maintenance of their own water systems, today we will discuss how easy it is to change a leaking tap washer.

Tools and Materials Required:

  • Step Ladder
  • Small Screwdriver
  • Wire strippers
  • Sticky Tape
  • Water pump plier (Optional)
  • Spanner (Optional)
  • Hammer (Optional)

Before You Start

Taps usually leak due to a faulty washer or a worn seat against which the washer is compressed. There are several different types and sizes of tap washers, so do not start with the changing of the washer unless you know what type of washer you need.

Turning Off the Water

Modern installations have a service valve fitted below each tap that makes it easy, all you need to do is turn off the valve that isolates the tap from the water supply.

If your installations are relatively old and you do not have service valves, you will have to turn off the mains water supply. This stops the water from flowing to all taps and do not forget to turn off your geyser!

Tip: Place the plug in the sink waste and block the overflow, as both have a nasty habit of swallowing screws and other small parts.

Let’s Get Started

Once the water supply is cut off, turn the tap on to allow the remaining water to drain. Remove the capstan head retaining screw, this will be in the side of the capstan head or under the cap in its center.

The cap might unscrew, or it may be prised out with a small screwdriver. If the capstan will not pull off, turn the tap on completely, slide a spanner over the spindle under the head, and gently tap the spanner upwards with a hammer.

Tip: Protect the basin with towels in case the head flies off and damages something.

Remove the tap cover or shield. If the shield will not undo, wrap a strip of inner tube around it to protect the finish and apply pressure using a water pump plier.Undo the large hexagon nut and remove the body, then remove the old washer from the jumper, this may be held in place by a nut. 

If so, then hold the jumper with pliers and undo the nut with a small spanner, now replace the washer.Check the washer seating for pitting, which will stop the washer making a perfect seal. If it is not perfectly smooth, it needs attention.

A plastic grommet may be inserted to make a new seat, by pushing the grommet into the hole. By Reassembling the tap and screwing the handle down, this will bed the grommet and create a new seat.

All done, easy-peasy!

Please feel free to ask any of our experienced salespeople for assistance or advice when purchasing a product, we are here to make your shopping experience as memorable as possible.

Build it Gansbaai offers local delivery, supplying the greater Overberg area with building materials, do-it-yourself home improvement tools, and expert advice.

Please follow us on social media to stay up to date with our latest sizzling specials and promotional offers! 

Visit us in store or log on to our online store and shop from the comfort of your own home: www.buildit-store.co.za

Build it Gansbaai offers added value services in respect of hardware retailing; embracing all activity within the building materials industry, focusing specifically on the building of; urban, township, rural housing as well as all home improvements and do it yourself.

Build it is a division of the SPAR Group Limited South Africa.  voluntary trading group of individually owned retail stores with more than 10 000 employees across the group, we currently have stores in South Africa, Namibia, Swaziland, Lesotho and Mozambique with plans to expand into Botswana and Zambia in the near future. We view ourselves not only as a supplier of materials, but as a partner to our valued customers in accomplishing their building or renovating projects

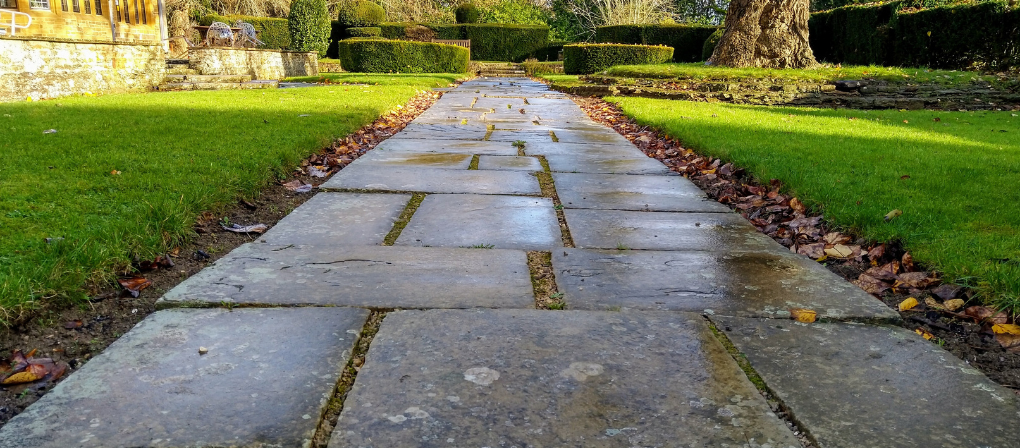
Categories
How To

Laying Paving Slabs

Laying paving slabs involves a great deal of physical labour, and in terms of technique, it is much more complicated than tiling a wall. 

Planning, accurate setting out and careful laying, especially during the early stages, will help you achieve your desired results.

Tools Required:

  1. Wooden Pegs
  2. Spirit Level
  3. Club Hammer
  4. Wooden Straight Edge
  5. Garden Roller
  6. Brush

Material Required:

  1. Pavers
  2. Mortar
  3. Gravel
  4. Sand
  5. Hardcore (broken bricks or crushed stone)

Setting Out the Paving Area:

Whenever feasible, plan an area of paving so that it can be laid with whole slabs only. This eliminates the arduous task of cutting units to fit. 

Use pegs and string to mark out the perimeter of the paved area and check the measurements before you excavate. 

You can use a straight wall as a datum line and measure away from it, to allow for a 100mm to 150mm margin of gravel between the wall and paving.

TIP

A gravel margin not only saves time and money by using fewer slabs, but also provides an area for planting climbers and for adequate drainage to keep the wall dry. It is a rule that all paving must be installed 150mm below a damp-proof course, to protect the building.

Marking out an area simply involves accurate measurement, as paving slabs are made to near precise dimensions, and keep an allowance of 6mm to 10mm gaps between the slabs. Some slabs are cast with sloping edges to provide a tapered joint and should be buttered edge to edge.

Preparing A Base for Paving

Paving slabs must be laid upon a firm level base, but the depth and substance of that base depends on the type of soil and the proposed use of the paving. Compact the soil with a garden roller and then spread the sand with a rake and level it by scraping and tamping with a length of timber. 

To support heavier loads, or if the soil is composed of clay or peat, lay a subbase of firmly compacted hardcore (broken bricks or crushed stone) to a depth of 75 to 100mm before spreading the sand to level the surface. If you plan to park vehicles on the paving, increase the depth of hardcore to 150mm.

Laying Paving Slabs

Lay a first-size blob of mortar under each corner and one more to support the center of the slab. 

If you intend to drive vehicles across slabs, lay a continuous bed of mortar about 50mm thick. Lay three slabs at a time, inserting wooden spacers between. 

Level each slab by tapping with a heavy hammer, using a block of wood to protect the surface.  Check the alignment. 

Gauge the slope across the paving by setting up data pegs along the high side. Drive them into the ground until the top of each corresponds to the finished surface of the paving, and then use a straight edge with a packing piece under one end to check the fall on the slabs.

Don’t Walk on the paving for two or three days, until the mortar has set. If you must cross the area lay planks across the slabs to spread the load. 

To fill the gaps between paving slabs, brush a dry mortar mix into the open joints. Remove any surplus material from the surface of the paving, then sprinkle the area with a very fine spray of water to consolidate the mortar. 

Please Note: Avoid dry mortaring if heavy rain is imminent, it may wash the mortar out.

Did You Know?

What is the difference between Mortar Mix and Concrete Mix?

The terms cement, concrete, and mortar are often used interchangeably, but they are different materials with different uses. Though both mortar and concrete are widely used building materials, they cannot be substituted for each other without compromising the integrity of a build.

Mortars with a high water-cement ratio bond best. 

This is the opposite of concrete, where concrete mix is formulated for strength and lower water content makes it stronger and more effective for its purpose. 

Additives or plasticizers may be added to mortar mixes to increase their flexibility.

All the Tools and Materials required for Laying Paving Slabs are available for purchase and delivery from the Build it Online Store www.buildit-store.com

Please send us a photo of your completed project, we would love to see it, you can upload your images in the comments section!

Remember to plan your next DIY project with Build it Gansbaai, get the job done right, first time.

Follow us on social media, to stay up to date with our latest sizzling specials and promotional offers!

Shop online www.buildit-store.co.za or visit us instore at Build it Gansbaai, your local building materials partner, helping you make home building simple! 

Build it Online store offers Free local delivery, supplying the Overstrand area with building materials, do-it-yourself home improvement tools, and expert advice.

Build it Gansbaai offers added value services in respect of hardware retailing; embracing all activity within the building materials industry, focusing specifically on the building of; urban, township, rural housing as well as all home improvements and do it yourself.